Fiored
Profile: 5428901346076263073Server: Miller | [Control] | [Map] | [Real-time Map]
Faction: Terran Republic
Outfit: Aeternum (a member since 2021-11-05 22:23:48.0)
Player Items
Attachment
Name | Class/Vehicle | Skillset | |
|---|---|---|---|
 | Ammo Capacity 1 | TOP WEAPON: G30 Walker | |
 | Magazine Size 1 | TOP WEAPON: G30 Walker | |
| Ammo Capacity 1 | TOP WEAPON: M12 Kobalt | |
| Ammo Capacity 2 | TOP WEAPON: M12 Kobalt | |
| Ammo Capacity 3 | TOP WEAPON: M12 Kobalt | |
| Ammo Capacity 4 | TOP WEAPON: M12 Kobalt | |
| Magazine Size 1 | TOP WEAPON: M12 Kobalt | |
| Magazine Size 2 | TOP WEAPON: M12 Kobalt | |
| Magazine Size 3 | TOP WEAPON: M12 Kobalt | |
| Magazine Size 4 | TOP WEAPON: M12 Kobalt | |
| Ammo Capacity 1 | TOP WEAPON: M20 Basilisk | |
| Ammo Capacity 2 | TOP WEAPON: M20 Basilisk | |
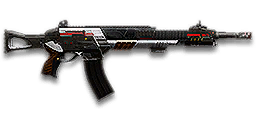
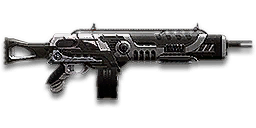
 | Compensator | Primary: Assault Rifle: CQR-40 | |
 | Flash Suppressor | Primary: Assault Rifle: CQR-40 | |
 | Forward Grip | Primary: Assault Rifle: CQR-40 | |
 | Laser Sight | Primary: Assault Rifle: CQR-40 | |
 | Soft Point Ammunition | Primary: Assault Rifle: CQR-40 | |
 | Suppressor | Primary: Assault Rifle: CQR-40 | |
| Flash Suppressor | Primary: Assault Rifle: Cycler TRV | |
| Forward Grip | Primary: Assault Rifle: Cycler TRV | |
| Soft Point Ammunition | Primary: Assault Rifle: Cycler TRV | |
| Suppressor | Primary: Assault Rifle: Cycler TRV | |
 | Flash Suppressor | Primary: Assault Rifle: NS-11 Platinum | |
 | Forward Grip | Primary: Assault Rifle: NS-11 Platinum | |
 | High Velocity Ammunition | Primary: Assault Rifle: NS-11 Platinum | |
| Soft Point Ammunition | Primary: Assault Rifle: NS-11 Platinum | |
 | Suppressor | Primary: Assault Rifle: NS-11 Platinum | |
 | Compensator | Primary: Assault Rifle: NS-11A | |
| Laser Sight | Primary: Assault Rifle: NS-11A | |
 | NiCO (1x) | Primary: Assault Rifle: NS-11A | |
| Soft Point Ammunition | Primary: Assault Rifle: NS-11A | |
| Compensator | Primary: Assault Rifle: SABR-13 | |
 | High Velocity Ammunition | Primary: Assault Rifle: SABR-13 | |
| Laser Sight | Primary: Assault Rifle: SABR-13 | |
 | RTA Reflex Sight (1x) | Primary: Assault Rifle: SABR-13 | |
| Suppressor | Primary: Assault Rifle: SABR-13 | |
| Flash Suppressor | Primary: Assault Rifle: T1 Cycler | |
| Laser Sight | Primary: Assault Rifle: T1 Cycler | |
| RTA Reflex Sight (1x) | Primary: Assault Rifle: T1 Cycler | |
 | Grenade Launcher | Primary: Assault Rifle: T1S Cycler | |
| RTA Reflex Sight (1x) | Primary: Assault Rifle: T1S Cycler | |
| Soft Point Ammunition | Primary: Assault Rifle: T1S Cycler | |
| Flash Suppressor | Primary: Assault Rifle: TAR | |
| Forward Grip | Primary: Assault Rifle: TAR | |
 | HDS (3.4x) | Primary: Assault Rifle: TAR | |
| Laser Sight | Primary: Assault Rifle: TAR | |
| Soft Point Ammunition | Primary: Assault Rifle: TAR | |
| Suppressor | Primary: Assault Rifle: TAR | |
| Compensator | Primary: Carbine: CBR-7 | |
| Flash Suppressor | Primary: Carbine: CBR-7 | |
| High Velocity Ammunition | Primary: Carbine: CBR-7 | |
| Laser Sight | Primary: Carbine: CBR-7 | |
| Suppressor | Primary: Carbine: CBR-7 | |
| Flash Suppressor | Primary: Carbine: LC2 Lynx | |
| Forward Grip | Primary: Carbine: LC2 Lynx | |
| Laser Sight | Primary: Carbine: LC2 Lynx | |
| Soft Point Ammunition | Primary: Carbine: LC2 Lynx | |
| Suppressor | Primary: Carbine: LC2 Lynx | |
| Laser Sight | Primary: Carbine: LC3 Jaguar | |
| Soft Point Ammunition | Primary: Carbine: LC3 Jaguar | |
| Suppressor | Primary: Carbine: LC3 Jaguar | |
| NiCO (1x) | Primary: Carbine: NS-11C | |
| Flash Suppressor | Primary: Carbine: TRAC-5 | |
| RTA Reflex Sight (1x) | Primary: Carbine: TRAC-5 | |
| RTA Reflex Sight (1x) | Primary: Carbine: TRAC-5 Burst | |
| Flash Suppressor | Primary: Carbine: TRAC-5 S | |
| Grenade Launcher | Primary: Carbine: TRAC-5 S | |
| Laser Sight | Primary: Carbine: TRAC-5 S | |
| Soft Point Ammunition | Primary: Carbine: TRAC-5 S | |
| Underbarrel Shotgun | Primary: Carbine: TRAC-5 S | |
| Ammo Capacity 1 | M4-F Pillager | |
| Ammo Capacity 2 | M4-F Pillager | |
| Ammo Capacity 3 | M4-F Pillager | |
| Ammo Capacity 4 | M4-F Pillager | |
 | 1.25x Zoom Optics | PRIMARY WEAPON: M20 Basilisk-F | |
| Ammo Capacity 1 | PRIMARY WEAPON: M20 Basilisk-F | |
| Ammo Capacity 2 | PRIMARY WEAPON: M20 Basilisk-F | |
| 1.5x Zoom Optics | PRIMARY WEAPON: M40 Fury-F | |
| Ammo Capacity 1 | PRIMARY WEAPON: M40 Fury-F | |
| Ammo Capacity 2 | PRIMARY WEAPON: M40 Fury-F | |
| Ammo Capacity 3 | PRIMARY WEAPON: M40 Fury-F | |
| Ammo Capacity 4 | PRIMARY WEAPON: M40 Fury-F | |
| Ammo Capacity 5 | PRIMARY WEAPON: M40 Fury-F | |
| Magazine Size 1 | PRIMARY WEAPON: M40 Fury-F | |
| Magazine Size 2 | PRIMARY WEAPON: M40 Fury-F | |
| 1.5x Zoom Optics | LEFT WEAPON: M20 Drake | |
| Ammo Capacity 1 | LEFT WEAPON: M20 Drake | |
| Ammo Capacity 2 | LEFT WEAPON: M20 Drake | |
| Ammo Capacity 3 | LEFT WEAPON: M20 Drake | |
| Ammo Capacity 4 | LEFT WEAPON: M20 Drake | |
| Ammo Capacity 5 | LEFT WEAPON: M20 Drake | |
| Magazine Size 1 | LEFT WEAPON: M20 Drake | |
| Magazine Size 2 | LEFT WEAPON: M20 Drake | |
| Magazine Size 3 | LEFT WEAPON: M20 Drake | |
| Magazine Size 4 | LEFT WEAPON: M20 Drake | |
| 1.5x Zoom Optics | LEFT WEAPON: M60-A Bulldog | |
| 1.25x Zoom Optics | LEFT WEAPON: M60-A Bulldog | |
| Ammo Capacity 1 | LEFT WEAPON: M60-A Bulldog | |
| Ammo Capacity 2 | LEFT WEAPON: M60-A Bulldog | |
| Ammo Capacity 3 | LEFT WEAPON: M60-A Bulldog | |
| Ammo Capacity 4 | LEFT WEAPON: M60-A Bulldog | |
| Magazine Size 1 | LEFT WEAPON: M60-A Bulldog | |
| Magazine Size 2 | LEFT WEAPON: M60-A Bulldog | |
| Magazine Size 3 | LEFT WEAPON: M60-A Bulldog | |
| Magazine Size 4 | LEFT WEAPON: M60-A Bulldog | |
| 2x Zoom Optics | RIGHT WEAPON: M20 Drake | |
| Ammo Capacity 1 | RIGHT WEAPON: M20 Drake | |
| Ammo Capacity 2 | RIGHT WEAPON: M20 Drake | |
| Ammo Capacity 3 | RIGHT WEAPON: M20 Drake | |
| Ammo Capacity 4 | RIGHT WEAPON: M20 Drake | |
| Magazine Size 1 | RIGHT WEAPON: M20 Drake | |
| Magazine Size 2 | RIGHT WEAPON: M20 Drake | |
| Magazine Size 3 | RIGHT WEAPON: M20 Drake | |
| Magazine Size 4 | RIGHT WEAPON: M20 Drake | |
| 1.5x Zoom Optics | RIGHT WEAPON: M60-A Bulldog | |
| 1.25x Zoom Optics | RIGHT WEAPON: M60-A Bulldog | |
| Ammo Capacity 1 | RIGHT WEAPON: M60-A Bulldog | |
| Ammo Capacity 2 | RIGHT WEAPON: M60-A Bulldog | |
| Ammo Capacity 3 | RIGHT WEAPON: M60-A Bulldog | |
| Ammo Capacity 4 | RIGHT WEAPON: M60-A Bulldog | |
| Ammo Capacity 5 | RIGHT WEAPON: M60-A Bulldog | |
| Magazine Size 1 | RIGHT WEAPON: M60-A Bulldog | |
| Magazine Size 2 | RIGHT WEAPON: M60-A Bulldog | |
| Magazine Size 3 | RIGHT WEAPON: M60-A Bulldog | |
| Magazine Size 4 | RIGHT WEAPON: M60-A Bulldog | |
| 1.25x Zoom Optics | TAIL WEAPON: A30 Walker | |
| 2x Zoom Optics | TAIL WEAPON: A30 Walker | |
| Ammo Capacity 1 | TAIL WEAPON: A30 Walker | |
| Ammo Capacity 2 | TAIL WEAPON: A30 Walker | |
| Ammo Capacity 3 | TAIL WEAPON: A30 Walker | |
| Ammo Capacity 4 | TAIL WEAPON: A30 Walker | |
| Magazine Size 1 | TAIL WEAPON: A30 Walker | |
| Magazine Size 2 | TAIL WEAPON: A30 Walker | |
| Magazine Size 3 | TAIL WEAPON: A30 Walker | |
| Magazine Size 4 | TAIL WEAPON: A30 Walker | |
| 1.5x Zoom Optics | TAIL WEAPON: M20 Drake | |
| Ammo Capacity 1 | TAIL WEAPON: M20 Drake | |
| Ammo Capacity 2 | TAIL WEAPON: M20 Drake | |
| Ammo Capacity 3 | TAIL WEAPON: M20 Drake | |
| Magazine Size 1 | TAIL WEAPON: M20 Drake | |
| Magazine Size 2 | TAIL WEAPON: M20 Drake | |
| Magazine Size 3 | TAIL WEAPON: M20 Drake | |
| Magazine Size 4 | TAIL WEAPON: M20 Drake | |
| 1.5x Zoom Optics | TOP WEAPON: A30 Walker | |
| 1.25x Zoom Optics | TOP WEAPON: A30 Walker | |
| 2x Zoom Optics | TOP WEAPON: A30 Walker | |
| Ammo Capacity 1 | TOP WEAPON: A30 Walker | |
| Ammo Capacity 2 | TOP WEAPON: A30 Walker | |
| Ammo Capacity 3 | TOP WEAPON: A30 Walker | |
| Ammo Capacity 4 | TOP WEAPON: A30 Walker | |
| Magazine Size 1 | TOP WEAPON: A30 Walker | |
| Magazine Size 2 | TOP WEAPON: A30 Walker | |
| Magazine Size 3 | TOP WEAPON: A30 Walker | |
| Magazine Size 4 | TOP WEAPON: A30 Walker | |
| Ammo Capacity 1 | TOP WEAPON: M20 Drake | |
| 1.25x Zoom Optics | TOP WEAPON: E540 Halberd-H | |
| 2x Zoom Optics | TOP WEAPON: E540 Halberd-H | |
| Ammo Capacity 1 | TOP WEAPON: E540 Halberd-H | |
| Ammo Capacity 2 | TOP WEAPON: E540 Halberd-H | |
| Ammo Capacity 3 | TOP WEAPON: E540 Halberd-H | |
| Ammo Capacity 4 | TOP WEAPON: E540 Halberd-H | |
| Ammo Capacity 5 | TOP WEAPON: E540 Halberd-H | |
 | Reload Speed 1 | TOP WEAPON: E540 Halberd-H | |
| Reload Speed 2 | TOP WEAPON: E540 Halberd-H | |
| Reload Speed 3 | TOP WEAPON: E540 Halberd-H | |
| Reload Speed 4 | TOP WEAPON: E540 Halberd-H | |
| Reload Speed 5 | TOP WEAPON: E540 Halberd-H | |
| 1.25x Zoom Optics | TOP WEAPON: G30 Vulcan-H | |
| Ammo Capacity 1 | TOP WEAPON: G30 Vulcan-H | |
| Ammo Capacity 2 | TOP WEAPON: G30 Vulcan-H | |
| Magazine Size 1 | TOP WEAPON: G30 Vulcan-H | |
| 1.5x Zoom Optics | TOP WEAPON: G40-F Ranger | |
| 1.25x Zoom Optics | TOP WEAPON: G40-F Ranger | |
| Ammo Capacity 1 | TOP WEAPON: G40-F Ranger | |
| Ammo Capacity 2 | TOP WEAPON: G40-F Ranger | |
| Ammo Capacity 3 | TOP WEAPON: G40-F Ranger | |
| Ammo Capacity 4 | TOP WEAPON: G40-F Ranger | |
| Magazine Size 1 | TOP WEAPON: G40-F Ranger | |
| Magazine Size 2 | TOP WEAPON: G40-F Ranger | |
| Magazine Size 3 | TOP WEAPON: G40-F Ranger | |
| 1.25x Zoom Optics | TOP WEAPON: M12 Kobalt-H | |
| Ammo Capacity 1 | TOP WEAPON: M12 Kobalt-H | |
| Ammo Capacity 2 | TOP WEAPON: M12 Kobalt-H | |
| Ammo Capacity 3 | TOP WEAPON: M12 Kobalt-H | |
| Ammo Capacity 4 | TOP WEAPON: M12 Kobalt-H | |
| Ammo Capacity 5 | TOP WEAPON: M12 Kobalt-H | |
| Magazine Size 1 | TOP WEAPON: M12 Kobalt-H | |
| Magazine Size 2 | TOP WEAPON: M12 Kobalt-H | |
| Magazine Size 3 | TOP WEAPON: M12 Kobalt-H | |
| Magazine Size 4 | TOP WEAPON: M12 Kobalt-H | |
| 1.5x Zoom Optics | TOP WEAPON: M40 Fury-H | |
| Ammo Capacity 1 | TOP WEAPON: M40 Fury-H | |
| Ammo Capacity 2 | TOP WEAPON: M40 Fury-H | |
| Ammo Capacity 3 | TOP WEAPON: M40 Fury-H | |
| Ammo Capacity 4 | TOP WEAPON: M40 Fury-H | |
| Ammo Capacity 5 | TOP WEAPON: M40 Fury-H | |
| Ammo Capacity 6 | TOP WEAPON: M40 Fury-H | |
| Magazine Size 1 | TOP WEAPON: M40 Fury-H | |
| Magazine Size 2 | TOP WEAPON: M40 Fury-H | |
 | Threat Detection Optics | TOP WEAPON: M40 Fury-H | |
| Extended Magazine | AF-4A Bandit | |
| MPL | AF-4A Bandit | |
 | Slug Ammunition | AF-4A Bandit | |
 | Explosive Bolt | Hunter QCX | |
 | HS/NV Scope (1x) | Hunter QCX | |
| Laser Sight | Hunter QCX | |
 | Soft Point Ammunition | Hunter QCX | |
| Explosive Bolt | Hunter QCX-B | |
| Laser Sight | Hunter QCX-B | |
| NiCO (1x) | Hunter QCX-B | |
| Laser Sight | Primary: Heavy Weapon: T7 Mini-Chaingun | |
| Flash Suppressor | Primary: LMG: MSW-R | |
 | Forward Grip | Primary: LMG: MSW-R | |
| Laser Sight | Primary: LMG: MSW-R | |
| Soft Point Ammunition | Primary: LMG: MSW-R | |
| Suppressor | Primary: LMG: MSW-R | |
| RTA Reflex Sight (1x) | Primary: LMG: T9 CARV | |
| High Velocity Ammunition | Primary: LMG: T9 CARV-S | |
| Laser Sight | Primary: LMG: T9 CARV-S | |
| RTA Reflex Sight (1x) | Primary: LMG: T9 CARV-S | |
| Suppressor | Primary: LMG: T9 CARV-S | |
| Extended Magazine | Primary: LMG: T16 | |
| Flash Suppressor | Primary: LMG: T16 | |
| High Velocity Ammunition | Primary: LMG: T16 | |
| Laser Sight | Primary: LMG: T16 | |
| RTA Reflex Sight (1x) | Primary: LMG: T16 | |
| Laser Sight | Primary: LMG: T32 Bull | |
| Soft Point Ammunition | Primary: LMG: T32 Bull | |
| High Velocity Ammunition | Primary: LMG: TMG-50 | |
| Laser Sight | Primary: LMG: TMG-50 | |
| Extended Magazine | Primary: Shotgun: AS16 NightHawk | |
| Extended Magazine | Primary: Shotgun: TAS-16 Blackjack | |
| Extended Magazine | Primary: Shotgun: TRS-12 Uppercut | |
| MPL | Primary: Shotgun: TRS-12 Uppercut | |
 | Slug Ammunition | Primary: Shotgun: TRS-12 Uppercut | |
| Compensator | Primary: SMG: SMG-46 Armistice | |
| Laser Sight | Primary: SMG: SMG-46 Armistice | |
| Soft Point Ammunition | Primary: SMG: SMG-46 Armistice | |
 | Suppressor | Primary: SMG: SMG-46 Armistice | |
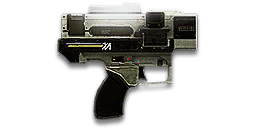
 | Laser Sight | Secondary: Pistol: NS-44 Commissioner | |
| Laser Sight | Secondary: Pistol: NS-44G Commissioner | |
| Laser Sight | Secondary: Pistol: NS-44P Commissioner | |
| Laser Sight | Secondary: Pistol: NS-357 Underboss | |
| Laser Sight | Secondary: Pistol: TX1 Repeater | |
| Suppressor | Secondary: Pistol: TX1 Repeater | |
| Laser Sight | Heartstring | |
| NiCO (1x) | Heartstring | |
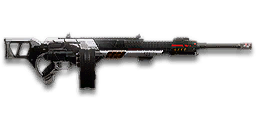
| Suppressor | Primary: Sniper Rifle: 99SV | |
 | ACS (4x) | Primary: Sniper Rifle: TSAR-42 | |
| RTA Reflex Sight (1x) | Primary: Sniper Rifle: TSAR-42 | |
 | Straight-Pull Bolt | Primary: Sniper Rifle: TSAR-42 | |
 | TMS (4x) | Primary: Sniper Rifle: TSAR-42 | |
| Ammo Capacity 1 | BELLY WEAPON: AP30 Shredder | |
| Ammo Capacity 2 | BELLY WEAPON: AP30 Shredder | |
| Ammo Capacity 3 | BELLY WEAPON: AP30 Shredder | |
| Ammo Capacity 4 | BELLY WEAPON: AP30 Shredder | |
| Ammo Capacity 5 | BELLY WEAPON: AP30 Shredder | |
| Magazine Size 1 | BELLY WEAPON: AP30 Shredder | |
| Magazine Size 2 | BELLY WEAPON: AP30 Shredder | |
| Magazine Size 3 | BELLY WEAPON: AP30 Shredder | |
| Magazine Size 4 | BELLY WEAPON: AP30 Shredder | |
| 1.5x Zoom Optics | BELLY WEAPON: C150 Dalton | |
| Ammo Capacity 1 | BELLY WEAPON: C150 Dalton | |
| Ammo Capacity 2 | BELLY WEAPON: C150 Dalton | |
| Ammo Capacity 3 | BELLY WEAPON: C150 Dalton | |
| Ammo Capacity 4 | BELLY WEAPON: C150 Dalton | |
| Ammo Capacity 5 | BELLY WEAPON: C150 Dalton | |
| Reload Speed 1 | BELLY WEAPON: C150 Dalton | |
| Reload Speed 2 | BELLY WEAPON: C150 Dalton | |
| Reload Speed 3 | BELLY WEAPON: C150 Dalton | |
| Reload Speed 4 | BELLY WEAPON: C150 Dalton | |
| Reload Speed 5 | BELLY WEAPON: C150 Dalton | |
| Threat Detection Optics | BELLY WEAPON: C150 Dalton | |
| 1.5x Zoom Optics | BELLY WEAPON: Dual-75 Duster | |
| Ammo Capacity 1 | BELLY WEAPON: Dual-75 Duster | |
| Ammo Capacity 2 | BELLY WEAPON: Dual-75 Duster | |
| Ammo Capacity 3 | BELLY WEAPON: Dual-75 Duster | |
| Ammo Capacity 4 | BELLY WEAPON: Dual-75 Duster | |
| Reload Speed 1 | BELLY WEAPON: Dual-75 Duster | |
| Reload Speed 2 | BELLY WEAPON: Dual-75 Duster | |
| 1.5x Zoom Optics | BELLY WEAPON: L105 Zephyr | |
| Ammo Capacity 1 | BELLY WEAPON: L105 Zephyr | |
| Reload Speed 1 | BELLY WEAPON: L105 Zephyr | |
| Reload Speed 2 | BELLY WEAPON: L105 Zephyr | |
| 1.25x Zoom Optics | NOSE WEAPON: CAS30 Tank Buster | |
| Ammo Capacity 1 | NOSE WEAPON: CAS30 Tank Buster | |
| Ammo Capacity 2 | NOSE WEAPON: CAS30 Tank Buster | |
| Ammo Capacity 3 | NOSE WEAPON: CAS30 Tank Buster | |
| Ammo Capacity 4 | NOSE WEAPON: CAS30 Tank Buster | |
| Magazine Size 1 | NOSE WEAPON: CAS30 Tank Buster | |
| Magazine Size 2 | NOSE WEAPON: CAS30 Tank Buster | |
| Magazine Size 3 | NOSE WEAPON: CAS30 Tank Buster | |
| Magazine Size 4 | NOSE WEAPON: CAS30 Tank Buster | |
| Threat Detection Optics | NOSE WEAPON: CAS30 Tank Buster | |
| 1.25x Zoom Optics | NOSE WEAPON: L-24R Spur | |
| Ammo Capacity 1 | NOSE WEAPON: L-24R Spur | |
| Ammo Capacity 2 | NOSE WEAPON: L-24R Spur | |
| Ammo Capacity 3 | NOSE WEAPON: L-24R Spur | |
| Magazine Size 1 | NOSE WEAPON: L-24R Spur | |
| Magazine Size 2 | NOSE WEAPON: L-24R Spur | |
| Magazine Size 3 | NOSE WEAPON: L-24R Spur | |
| Magazine Size 4 | NOSE WEAPON: L-24R Spur | |
| 1.5x Zoom Optics | NOSE WEAPON: L-30R Vektor | |
| Ammo Capacity 1 | NOSE WEAPON: L-30R Vektor | |
| Ammo Capacity 2 | NOSE WEAPON: L-30R Vektor | |
| Ammo Capacity 3 | NOSE WEAPON: L-30R Vektor | |
| Ammo Capacity 4 | NOSE WEAPON: L-30R Vektor | |
| Magazine Size 1 | NOSE WEAPON: L-30R Vektor | |
| Magazine Size 2 | NOSE WEAPON: L-30R Vektor | |
| Magazine Size 3 | NOSE WEAPON: L-30R Vektor | |
| Magazine Size 4 | NOSE WEAPON: L-30R Vektor | |
| 1.25x Zoom Optics | TAIL WEAPON: A30 Walker | |
| Ammo Capacity 1 | TAIL WEAPON: A30 Walker | |
| Ammo Capacity 2 | TAIL WEAPON: A30 Walker | |
| Ammo Capacity 3 | TAIL WEAPON: A30 Walker | |
| Magazine Size 1 | TAIL WEAPON: A30 Walker | |
| Magazine Size 2 | TAIL WEAPON: A30 Walker | |
| Magazine Size 3 | TAIL WEAPON: A30 Walker | |
| Magazine Size 4 | TAIL WEAPON: A30 Walker | |
| 1.25x Zoom Optics | TAIL WEAPON: Hyena Missile Launcher | |
| Ammo Capacity 1 | TAIL WEAPON: Hyena Missile Launcher | |
| Reload Speed 1 | TAIL WEAPON: Hyena Missile Launcher | |
| Reload Speed 2 | TAIL WEAPON: Hyena Missile Launcher | |
| Ammo Capacity 1 | TAIL WEAPON: M20 Drake | |
| Magazine Size 1 | TAIL WEAPON: M20 Drake | |
| Magazine Size 2 | TAIL WEAPON: M20 Drake | |
| Magazine Size 3 | TAIL WEAPON: M20 Drake | |
| Magazine Size 4 | TAIL WEAPON: M20 Drake | |
| 1.5x Zoom Optics | TAIL WEAPON: M60-A Bulldog | |
| 1.25x Zoom Optics | TAIL WEAPON: M60-A Bulldog | |
| Ammo Capacity 1 | TAIL WEAPON: M60-A Bulldog | |
| Ammo Capacity 2 | TAIL WEAPON: M60-A Bulldog | |
| Ammo Capacity 3 | TAIL WEAPON: M60-A Bulldog | |
| Ammo Capacity 4 | TAIL WEAPON: M60-A Bulldog | |
| Magazine Size 1 | TAIL WEAPON: M60-A Bulldog | |
| Magazine Size 2 | TAIL WEAPON: M60-A Bulldog | |
| Magazine Size 3 | TAIL WEAPON: M60-A Bulldog | |
| Magazine Size 4 | TAIL WEAPON: M60-A Bulldog | |
| Ammo Capacity 1 | PRIMARY WEAPON: C75 Viper | |
| Ammo Capacity 2 | PRIMARY WEAPON: C75 Viper | |
| Ammo Capacity 3 | PRIMARY WEAPON: C75 Viper | |
| Reload Speed 1 | PRIMARY WEAPON: C75 Viper | |
| Reload Speed 2 | PRIMARY WEAPON: C75 Viper | |
| Reload Speed 3 | PRIMARY WEAPON: C75 Viper | |
| 1.25x Zoom Optics | PRIMARY WEAPON: L100 Python AP | |
| 2x Zoom Optics | PRIMARY WEAPON: L100 Python AP | |
| Ammo Capacity 1 | PRIMARY WEAPON: L100 Python AP | |
| Ammo Capacity 2 | PRIMARY WEAPON: L100 Python AP | |
| Ammo Capacity 3 | PRIMARY WEAPON: L100 Python AP | |
| Ammo Capacity 4 | PRIMARY WEAPON: L100 Python AP | |
| Ammo Capacity 5 | PRIMARY WEAPON: L100 Python AP | |
| Ammo Capacity 6 | PRIMARY WEAPON: L100 Python AP | |
| Ammo Capacity 7 | PRIMARY WEAPON: L100 Python AP | |
| Reload Speed 1 | PRIMARY WEAPON: L100 Python AP | |
| Reload Speed 2 | PRIMARY WEAPON: L100 Python AP | |
| Reload Speed 3 | PRIMARY WEAPON: L100 Python AP | |
| Reload Speed 4 | PRIMARY WEAPON: L100 Python AP | |
| Reload Speed 5 | PRIMARY WEAPON: L100 Python AP | |
| 1.25x Zoom Optics | PRIMARY WEAPON: L100 Python HESH | |
| Ammo Capacity 1 | PRIMARY WEAPON: L100 Python HESH | |
| Ammo Capacity 2 | PRIMARY WEAPON: L100 Python HESH | |
| Ammo Capacity 3 | PRIMARY WEAPON: L100 Python HESH | |
| Ammo Capacity 4 | PRIMARY WEAPON: L100 Python HESH | |
| Reload Speed 1 | PRIMARY WEAPON: L100 Python HESH | |
| Reload Speed 2 | PRIMARY WEAPON: L100 Python HESH | |
| Reload Speed 3 | PRIMARY WEAPON: L100 Python HESH | |
| Reload Speed 4 | PRIMARY WEAPON: L100 Python HESH | |
| Reload Speed 5 | PRIMARY WEAPON: L100 Python HESH | |
| Extended Magazine | Primary Left: Anti-Infantry: MRC3 Mercy | |
| Extended Magazine | Primary Right: Anti-Infantry: MRC3 Mercy | |
| 1.25x Zoom Optics | NOSE CANNON: M14 Banshee | |
| Ammo Capacity 1 | NOSE CANNON: M14 Banshee | |
| Ammo Capacity 2 | NOSE CANNON: M14 Banshee | |
| Ammo Capacity 3 | NOSE CANNON: M14 Banshee | |
| Ammo Capacity 4 | NOSE CANNON: M14 Banshee | |
| Ammo Capacity 5 | NOSE CANNON: M14 Banshee | |
| Ammo Capacity 6 | NOSE CANNON: M14 Banshee | |
| Ammo Capacity 7 | NOSE CANNON: M14 Banshee | |
| Ammo Capacity 8 | NOSE CANNON: M14 Banshee | |
| Ammo Capacity 9 | NOSE CANNON: M14 Banshee | |
| Magazine Size 1 | NOSE CANNON: M14 Banshee | |
| Magazine Size 2 | NOSE CANNON: M14 Banshee | |
| Magazine Size 3 | NOSE CANNON: M14 Banshee | |
| Magazine Size 4 | NOSE CANNON: M14 Banshee | |
| Ammo Capacity 1 | NOSE CANNON: M18 Locust | |
| Ammo Capacity 2 | NOSE CANNON: M18 Locust | |
| Ammo Capacity 3 | NOSE CANNON: M18 Locust | |
| Ammo Capacity 4 | NOSE CANNON: M18 Locust | |
| Ammo Capacity 5 | NOSE CANNON: M18 Locust | |
| Ammo Capacity 6 | NOSE CANNON: M18 Locust | |
| Reload Speed 1 | NOSE CANNON: M18 Locust | |
| Reload Speed 2 | NOSE CANNON: M18 Locust | |
| Reload Speed 3 | NOSE CANNON: M18 Locust | |
| Reload Speed 4 | NOSE CANNON: M18 Locust | |
| Reload Speed 5 | NOSE CANNON: M18 Locust | |
| Threat Detection Optics | NOSE CANNON: M18 Locust | |
| Ammo Capacity 1 | NOSE CANNON: M18 Needler | |
| Ammo Capacity 2 | NOSE CANNON: M18 Needler | |
| Ammo Capacity 3 | NOSE CANNON: M18 Needler | |
| Ammo Capacity 4 | NOSE CANNON: M18 Needler | |
| Ammo Capacity 5 | NOSE CANNON: M18 Needler | |
| Ammo Capacity 6 | NOSE CANNON: M18 Needler | |
| Ammo Capacity 7 | NOSE CANNON: M18 Needler | |
| Ammo Capacity 8 | NOSE CANNON: M18 Needler | |
| Ammo Capacity 9 | NOSE CANNON: M18 Needler | |
| Ammo Capacity 10 | NOSE CANNON: M18 Needler | |
| Magazine Size 1 | NOSE CANNON: M18 Needler | |
| Magazine Size 2 | NOSE CANNON: M18 Needler | |
| Magazine Size 3 | NOSE CANNON: M18 Needler | |
| Magazine Size 4 | NOSE CANNON: M18 Needler | |
| 1.25x Zoom Optics | NOSE CANNON: M18 Rotary | |
| Ammo Capacity 1 | NOSE CANNON: M18 Rotary | |
| Ammo Capacity 2 | NOSE CANNON: M18 Rotary | |
| Ammo Capacity 3 | NOSE CANNON: M18 Rotary | |
| Ammo Capacity 4 | NOSE CANNON: M18 Rotary | |
| Ammo Capacity 5 | NOSE CANNON: M18 Rotary | |
| Ammo Capacity 6 | NOSE CANNON: M18 Rotary | |
| Ammo Capacity 7 | NOSE CANNON: M18 Rotary | |
| Ammo Capacity 8 | NOSE CANNON: M18 Rotary | |
| Ammo Capacity 9 | NOSE CANNON: M18 Rotary | |
| Ammo Capacity 10 | NOSE CANNON: M18 Rotary | |
| Magazine Size 1 | NOSE CANNON: M18 Rotary | |
| Magazine Size 2 | NOSE CANNON: M18 Rotary | |
| Magazine Size 3 | NOSE CANNON: M18 Rotary | |
| Magazine Size 4 | NOSE CANNON: M18 Rotary | |
| 1.25x Zoom Optics | WING MOUNT: Hellfire Rocket Pods | |
| Ammo Capacity 1 | WING MOUNT: Hellfire Rocket Pods | |
| Ammo Capacity 2 | WING MOUNT: Hellfire Rocket Pods | |
| Ammo Capacity 3 | WING MOUNT: Hellfire Rocket Pods | |
| Ammo Capacity 4 | WING MOUNT: Hellfire Rocket Pods | |
| Ammo Capacity 5 | WING MOUNT: Hellfire Rocket Pods | |
| Ammo Capacity 6 | WING MOUNT: Hellfire Rocket Pods | |
| Reload Speed 1 | WING MOUNT: Hellfire Rocket Pods | |
| Reload Speed 2 | WING MOUNT: Hellfire Rocket Pods | |
| Reload Speed 3 | WING MOUNT: Hellfire Rocket Pods | |
| Reload Speed 4 | WING MOUNT: Hellfire Rocket Pods | |
| Reload Speed 5 | WING MOUNT: Hellfire Rocket Pods | |
| Threat Detection Optics | WING MOUNT: Hellfire Rocket Pods | |
| 1.25x Zoom Optics | WING MOUNT: Tomcat A2AM Pods | |
| Ammo Capacity 1 | WING MOUNT: Tomcat A2AM Pods | |
| Ammo Capacity 2 | WING MOUNT: Tomcat A2AM Pods | |
| Ammo Capacity 3 | WING MOUNT: Tomcat A2AM Pods | |
 | Lock on Range 1 | WING MOUNT: Tomcat A2AM Pods | |
| Lock on Range 2 | WING MOUNT: Tomcat A2AM Pods | |
| Lock on Range 3 | WING MOUNT: Tomcat A2AM Pods | |
| 1.25x Zoom Optics | WING MOUNT: Hornet Missiles | |
| Ammo Capacity 1 | WING MOUNT: Hornet Missiles | |
| Ammo Capacity 2 | WING MOUNT: Hornet Missiles | |
| Ammo Capacity 3 | WING MOUNT: Hornet Missiles | |
| Ammo Capacity 4 | WING MOUNT: Hornet Missiles | |
| Ammo Capacity 5 | WING MOUNT: Hornet Missiles | |
| Reload Speed 1 | WING MOUNT: Hornet Missiles | |
| Reload Speed 2 | WING MOUNT: Hornet Missiles | |
| Reload Speed 3 | WING MOUNT: Hornet Missiles | |
| Reload Speed 4 | WING MOUNT: Hornet Missiles | |
| Reload Speed 5 | WING MOUNT: Hornet Missiles | |
| Threat Detection Optics | WING MOUNT: Hornet Missiles | |
| 1.25x Zoom Optics | GUNNER WEAPON: E540 Halberd | |
| 2x Zoom Optics | GUNNER WEAPON: E540 Halberd | |
| Ammo Capacity 1 | GUNNER WEAPON: E540 Halberd | |
| Ammo Capacity 2 | GUNNER WEAPON: E540 Halberd | |
| Ammo Capacity 3 | GUNNER WEAPON: E540 Halberd | |
| Ammo Capacity 4 | GUNNER WEAPON: E540 Halberd | |
| Ammo Capacity 5 | GUNNER WEAPON: E540 Halberd | |
| Reload Speed 1 | GUNNER WEAPON: E540 Halberd | |
| Reload Speed 2 | GUNNER WEAPON: E540 Halberd | |
| Reload Speed 3 | GUNNER WEAPON: E540 Halberd | |
| Reload Speed 4 | GUNNER WEAPON: E540 Halberd | |
| Reload Speed 5 | GUNNER WEAPON: E540 Halberd | |
| Threat Detection Optics | GUNNER WEAPON: E540 Halberd | |
| 1.25x Zoom Optics | GUNNER WEAPON: G40-F Ranger | |
| Ammo Capacity 1 | GUNNER WEAPON: G40-F Ranger | |
| Ammo Capacity 2 | GUNNER WEAPON: G40-F Ranger | |
| Ammo Capacity 3 | GUNNER WEAPON: G40-F Ranger | |
| Magazine Size 1 | GUNNER WEAPON: G40-F Ranger | |
| Magazine Size 2 | GUNNER WEAPON: G40-F Ranger | |
| Magazine Size 3 | GUNNER WEAPON: G40-F Ranger | |
| 1.25x Zoom Optics | GUNNER WEAPON: M12 Kobalt | |
| Ammo Capacity 1 | GUNNER WEAPON: M12 Kobalt | |
| Ammo Capacity 2 | GUNNER WEAPON: M12 Kobalt | |
| Ammo Capacity 3 | GUNNER WEAPON: M12 Kobalt | |
| Ammo Capacity 4 | GUNNER WEAPON: M12 Kobalt | |
| Magazine Size 1 | GUNNER WEAPON: M12 Kobalt | |
| Magazine Size 2 | GUNNER WEAPON: M12 Kobalt | |
| Magazine Size 3 | GUNNER WEAPON: M12 Kobalt | |
| Ammo Capacity 1 | GUNNER WEAPON: M20 Basilisk | |
| Ammo Capacity 2 | GUNNER WEAPON: M20 Basilisk | |
| Ammo Capacity 3 | GUNNER WEAPON: M20 Basilisk | |
| Magazine Size 1 | GUNNER WEAPON: M20 Basilisk | |
| Magazine Size 2 | GUNNER WEAPON: M20 Basilisk | |
| Ammo Capacity 1 | MR11 Gatekeeper | |
| Ammo Capacity 2 | MR11 Gatekeeper | |
| Ammo Capacity 3 | MR11 Gatekeeper | |
| Ammo Capacity 4 | MR11 Gatekeeper | |
| Ammo Capacity 5 | MR11 Gatekeeper | |
| Ammo Capacity 6 | MR11 Gatekeeper | |
| Reload Speed 1 | MR11 Gatekeeper | |
| Reload Speed 2 | MR11 Gatekeeper | |
| Reload Speed 3 | MR11 Gatekeeper | |
| Reload Speed 4 | MR11 Gatekeeper | |
| Reload Speed 5 | MR11 Gatekeeper | |
| 1.25x Zoom Optics | PRIMARY WEAPON: P2-120 AP | |
| 2x Zoom Optics | PRIMARY WEAPON: P2-120 AP | |
| Ammo Capacity 1 | PRIMARY WEAPON: P2-120 AP | |
| Ammo Capacity 2 | PRIMARY WEAPON: P2-120 AP | |
| Ammo Capacity 3 | PRIMARY WEAPON: P2-120 AP | |
| Ammo Capacity 4 | PRIMARY WEAPON: P2-120 AP | |
| Ammo Capacity 5 | PRIMARY WEAPON: P2-120 AP | |
| Ammo Capacity 6 | PRIMARY WEAPON: P2-120 AP | |
| Ammo Capacity 7 | PRIMARY WEAPON: P2-120 AP | |
| Ammo Capacity 8 | PRIMARY WEAPON: P2-120 AP | |
| Reload Speed 1 | PRIMARY WEAPON: P2-120 AP | |
| Reload Speed 2 | PRIMARY WEAPON: P2-120 AP | |
| Reload Speed 3 | PRIMARY WEAPON: P2-120 AP | |
| Reload Speed 4 | PRIMARY WEAPON: P2-120 AP | |
| Reload Speed 5 | PRIMARY WEAPON: P2-120 AP | |
| 1.5x Zoom Optics | PRIMARY WEAPON: P2-120 HEAT | |
| Ammo Capacity 1 | PRIMARY WEAPON: P2-120 HEAT | |
| Ammo Capacity 2 | PRIMARY WEAPON: P2-120 HEAT | |
| Ammo Capacity 3 | PRIMARY WEAPON: P2-120 HEAT | |
| Ammo Capacity 4 | PRIMARY WEAPON: P2-120 HEAT | |
| Reload Speed 1 | PRIMARY WEAPON: P2-120 HEAT | |
| Reload Speed 2 | PRIMARY WEAPON: P2-120 HEAT | |
| Reload Speed 3 | PRIMARY WEAPON: P2-120 HEAT | |
| Reload Speed 4 | PRIMARY WEAPON: P2-120 HEAT | |
| Reload Speed 5 | PRIMARY WEAPON: P2-120 HEAT | |
| 1.25x Zoom Optics | PRIMARY WEAPON: P2-120 HESH | |
| 2x Zoom Optics | PRIMARY WEAPON: P2-120 HESH | |
| Ammo Capacity 1 | PRIMARY WEAPON: P2-120 HESH | |
| Ammo Capacity 2 | PRIMARY WEAPON: P2-120 HESH | |
| Ammo Capacity 3 | PRIMARY WEAPON: P2-120 HESH | |
| Ammo Capacity 4 | PRIMARY WEAPON: P2-120 HESH | |
| Ammo Capacity 5 | PRIMARY WEAPON: P2-120 HESH | |
| Ammo Capacity 6 | PRIMARY WEAPON: P2-120 HESH | |
| Ammo Capacity 7 | PRIMARY WEAPON: P2-120 HESH | |
| Ammo Capacity 8 | PRIMARY WEAPON: P2-120 HESH | |
| Ammo Capacity 9 | PRIMARY WEAPON: P2-120 HESH | |
| Ammo Capacity 10 | PRIMARY WEAPON: P2-120 HESH | |
| Reload Speed 1 | PRIMARY WEAPON: P2-120 HESH | |
| Reload Speed 2 | PRIMARY WEAPON: P2-120 HESH | |
| Reload Speed 3 | PRIMARY WEAPON: P2-120 HESH | |
| Reload Speed 4 | PRIMARY WEAPON: P2-120 HESH | |
| Reload Speed 5 | PRIMARY WEAPON: P2-120 HESH | |
| 1.25x Zoom Optics | FRONT WEAPON: G40-F Ranger | |
| Ammo Capacity 1 | FRONT WEAPON: G40-F Ranger | |
| Magazine Size 1 | FRONT WEAPON: G40-F Ranger | |
| Ammo Capacity 1 | FRONT WEAPON: M12 Kobalt | |
| Ammo Capacity 2 | FRONT WEAPON: M12 Kobalt | |
| Ammo Capacity 3 | FRONT WEAPON: M12 Kobalt | |
| Ammo Capacity 4 | FRONT WEAPON: M12 Kobalt | |
| Magazine Size 1 | FRONT WEAPON: M12 Kobalt | |
| Magazine Size 2 | FRONT WEAPON: M12 Kobalt | |
| Magazine Size 3 | FRONT WEAPON: M12 Kobalt | |
| Ammo Capacity 1 | FRONT WEAPON: M20 Basilisk | |
| Magazine Size 1 | FRONT WEAPON: M20 Basilisk | |
| 1.25x Zoom Optics | FRONT WEAPON: M60-G Bulldog | |
| Ammo Capacity 1 | FRONT WEAPON: M60-G Bulldog | |
| Ammo Capacity 2 | FRONT WEAPON: M60-G Bulldog | |
| Ammo Capacity 3 | FRONT WEAPON: M60-G Bulldog | |
| Ammo Capacity 4 | FRONT WEAPON: M60-G Bulldog | |
| Ammo Capacity 5 | FRONT WEAPON: M60-G Bulldog | |
| Magazine Size 1 | FRONT WEAPON: M60-G Bulldog | |
| Magazine Size 2 | FRONT WEAPON: M60-G Bulldog | |
| Magazine Size 3 | FRONT WEAPON: M60-G Bulldog | |
| Magazine Size 4 | FRONT WEAPON: M60-G Bulldog | |
| 1.25x Zoom Optics | REAR WEAPON: G40-F Ranger | |
| Ammo Capacity 1 | REAR WEAPON: G40-F Ranger | |
| Ammo Capacity 2 | REAR WEAPON: G40-F Ranger | |
| Ammo Capacity 3 | REAR WEAPON: G40-F Ranger | |
| Ammo Capacity 4 | REAR WEAPON: G40-F Ranger | |
| Magazine Size 1 | REAR WEAPON: G40-F Ranger | |
| Magazine Size 2 | REAR WEAPON: G40-F Ranger | |
| 1.25x Zoom Optics | REAR WEAPON: M12 Kobalt | |
| Ammo Capacity 1 | REAR WEAPON: M12 Kobalt | |
| Ammo Capacity 2 | REAR WEAPON: M12 Kobalt | |
| Ammo Capacity 3 | REAR WEAPON: M12 Kobalt | |
| Ammo Capacity 4 | REAR WEAPON: M12 Kobalt | |
| Ammo Capacity 5 | REAR WEAPON: M12 Kobalt | |
| Magazine Size 1 | REAR WEAPON: M12 Kobalt | |
| Magazine Size 2 | REAR WEAPON: M12 Kobalt | |
| Magazine Size 3 | REAR WEAPON: M12 Kobalt | |
| Magazine Size 4 | REAR WEAPON: M12 Kobalt | |
| Ammo Capacity 1 | REAR WEAPON: M20 Basilisk | |
| Magazine Size 1 | REAR WEAPON: M20 Basilisk | |
| 1.25x Zoom Optics | REAR WEAPON: M60-G Bulldog | |
| Ammo Capacity 1 | REAR WEAPON: M60-G Bulldog | |
| Magazine Size 1 | REAR WEAPON: M60-G Bulldog | |
| Magazine Size 2 | REAR WEAPON: M60-G Bulldog | |
| Magazine Size 3 | REAR WEAPON: M60-G Bulldog | |
| Magazine Size 4 | REAR WEAPON: M60-G Bulldog | |
| Ammo Capacity 1 | CAS 14-E | |
| Ammo Capacity 2 | CAS 14-E | |
| Ammo Capacity 3 | CAS 14-E | |
| Ammo Capacity 4 | CAS 14-E | |
| Magazine Size 1 | CAS 14-E | |
| Magazine Size 2 | CAS 14-E | |
| Magazine Size 3 | CAS 14-E | |
| Ammo Capacity 1 | Hellion G20 | |
| Magazine Size 1 | M20 Wyvern | |
| Magazine Size 2 | M20 Wyvern | |
| Magazine Size 3 | M20 Wyvern | |
| 1.25x Zoom Optics | CAS 14-E | |
| 1.25x Zoom Optics | Hellion G20 | |
 | TekLyte Reflex (1x) | Primary: Assault Rifle: NC1 Gauss Rifle | |
 | HPR Reflex (1x) | Primary: Assault Rifle: Pulsar VS1 | |
| TekLyte Reflex (1x) | Primary: Carbine: AF-19 Mercenary | |
| HPR Reflex (1x) | Primary: Carbine: Solstice VE3 | |
| TekLyte Reflex (1x) | Primary: LMG: GD-22S | |
| TekLyte Reflex (1x) | Primary: LMG: NC6 Gauss SAW | |
| HPR Reflex (1x) | Primary: LMG: Orion VS54 | |
| 1.25x Zoom Optics | ||
| 1.25x Zoom Optics | ||
| 1.25x Zoom Optics | ||
| 1.25x Zoom Optics | ||
| ACS (4x) | ||
 | CCLR (1x) | ||
| Compensator | ||
| Compensator | ||
 | DV6 (6x) | ||
| Extended Magazine | ||
 | Extended Magazine | ||
 | Extended Magazine | ||
| Flash Suppressor | ||
| Flash Suppressor | ||
| Flash Suppressor | ||
| Flash Suppressor | ||
| Flash Suppressor | ||
 | Flash Suppressor | ||
| Flash Suppressor | ||
| Forward Grip | ||
| Forward Grip | ||
| Forward Grip | ||
| Forward Grip | ||
 | Forward Grip | ||
 | Forward Grip | ||
| Forward Grip | ||
| Forward Grip | ||
| Heavy Magazine | ||
| Hybrid Suppressor | ||
| Laser Sight | ||
| Laser Sight | ||
| Laser Sight | ||
| Laser Sight | ||
| Laser Sight | ||
| Laser Sight | ||
| Laser Sight | ||
| Laser Sight | ||
| Laser Sight | ||
| Laser Sight | ||
| Laser Sight | ||
 | MH2 Reflex Sight (2x) - Terran | ||
 | MH2 Reflex Sight (2x) - Yellow Dot | ||
| MPL | ||
| NiCO (1x) | ||
| NiCO (1x) | ||
 | NiCO (1x) - Square | ||
| NiCO (1x) - Square | ||
 | NiCO (1x) - Yellow Dot | ||
| NiCO (1x) - Yellow Dot | ||
| NiCO (1x) - Yellow Dot | ||
| NiCO (1x) - Yellow Dot | ||
| NiCO (1x) - Yellow Dot | ||
| NiCO (1x) - Yellow Dot | ||
| NiCO (1x) - Yellow Dot | ||
 | NiCO XR (2x) | ||
 | NiCO XR (2x) - Square | ||
| NiCO XR (2x) - Square | ||
 | NiCO XR (2x) - Yellow Dot | ||
 | Quadra (4x) | ||
| RTA Reflex Sight (1x) | ||
| RTA Reflex Sight (1x) | ||
 | RTA Reflex Sight (1x) - Yellow Dot | ||
| RTA Reflex Sight (1x) - Yellow Dot | ||
| RTA Reflex Sight (1x) - Yellow Dot | ||
| RTA Reflex Sight (1x) - Yellow Dot | ||
| RTA Reflex Sight (1x) - Yellow Dot | ||
| RTA Reflex Sight (1x) - Yellow Dot | ||
| RTA Reflex Sight (1x) - Yellow Dot | ||
| RTA Reflex Sight (1x) - Yellow Dot | ||
| RTA Reflex Sight (1x) - Yellow Dot | ||
| RTA Reflex Sight (1x) - Yellow Dot | ||
| RTA Reflex Sight (1x) - Yellow Dot | ||
| RTA Reflex Sight (1x) - Yellow Dot | ||
| RTA Reflex Sight (1x) - Yellow Dot | ||
| RTA Reflex Sight (1x) - Yellow Dot | ||
 | Sabot Rocklets | ||
 | Single-Fire Barrel | ||
| Slug Ammunition | ||
| Slug Ammunition | ||
 | SO7 (7x) | ||
| Soft Point Ammunition | ||
| Soft Point Ammunition | ||
| Soft Point Ammunition | ||
| Soft Point Ammunition | ||
| Soft Point Ammunition | ||
| Soft Point Ammunition | ||
| Soft Point Ammunition | ||
| Soft Point Ammunition | ||
| Soft Point Ammunition | ||
| Soft Point Ammunition | ||
| Soft Point Ammunition | ||
| Soft Point Ammunition | ||
| Straight-Pull Bolt | ||
| Suppressor | ||
| Suppressor | ||
| Suppressor | ||
 | Suppressor | ||
| Threat Detection Optics | ||
| TMS (4x) | ||
 | TSO-1 (1x) | ||
| TSO-1 (1x) | ||
 | TSO-1 (1x) - Yellow Dot | ||
| TSO-2 (2x) | ||
| TSO-2 (2x) - Yellow Dot | ||
| TSO-2 (2x) - Yellow Dot | ||
 | TSO-3.4 (3.4x) | ||
 | TSO-4 (4x) - T-Dot | ||
 | Typhoon Rocklets | ||
| Name | Class/Vehicle | Skillset |
Boost
Name | Class/Vehicle | Skillset | |
|---|---|---|---|
 | Experience Boost - 1 Day | ||
 | Experience Boost - 1 Hour | ||
 | Heroic Boost - 1 Month | ||
 | Heroic Boost - 6 Month | ||
 | Squad Experience Boost - 1 Day | ||
| Name | Class/Vehicle | Skillset |
CertPoint
Name | Class/Vehicle | Skillset | |
|---|---|---|---|
| 2 Cert Points | |||
| 10 Cert Points | |||
 | 10 Certs | ||
| 20 Cert Points | |||
| 20 Certs | ||
| 50 Certs | ||
| 50 Certs | ||
| 70 Certs | ||
| 100 Cert Points | ||
| 100 Certs | ||
| 200 Cert Points | |||
| 250 Certs | ||
| Name | Class/Vehicle | Skillset |
Customization
Name | Class/Vehicle | Skillset | |
|---|---|---|---|
 | 5 Years of Loyalty | ||
 | Captain 1 Decal | ||
 | Captain 2 Decal | ||
 | Captain 3 Decal | ||
 | Captain 4 Decal | ||
 | Captain 5 Decal | ||
 | Classic Celtic Decal | ||
 | Classic Devil Decal | ||
 | Classic Eagle Decal | ||
 | Classic Flame Decal | ||
 | Classic Hornet Decal | ||
 | Classic Match Decal | ||
 | Classic Poodle Decal | ||
 | Classic Raven Decal | ||
 | Classic Red Star Decal | ||
 | Classic Scorpion Decal | ||
 | Classic Shield Decal | ||
 | Classic Skull Cross Decal | ||
 | Classic Snake Decal | ||
 | Classic Winged Skull Decal | ||
 | Classic Wings Decal | ||
 | Colonel 1 Decal | ||
 | Colonel 2 Decal | ||
 | Colonel 3 Decal | ||
 | Colonel 4 Decal | ||
 | Colonel 5 Decal | ||
 | Comm. Sgt. Major 1 Decal | ||
 | Comm. Sgt. Major 2 Decal | ||
 | Comm. Sgt. Major 3 Decal | ||
 | Commander 1 Decal | ||
 | Commander 2 Decal | ||
 | Commander 3 Decal | ||
 | Commander 4 Decal | ||
 | Commander 5 Decal | ||
 | Commissar 1 Decal | ||
 | Commissar 2 Decal | ||
 | Commissar 3 Decal | ||
 | Commissar 4 Decal | ||
 | Commissar 5 Decal | ||
 | Commissar 6 Decal | ||
 | Corporal 1 Decal | ||
 | Corporal 2 Decal | ||
 | Corporal 3 Decal | ||
 | Field Marshal Decal | ||
 | First Lt. 1 Decal | ||
 | First Lt. 2 Decal | ||
 | First Lt. 3 Decal | ||
 | First Lt. 4 Decal | ||
 | First Sgt. 1 Decal | ||
 | First Sgt. 2 Decal | ||
 | First Sgt. 3 Decal | ||
 | General 1 Decal | ||
 | General 2 Decal | ||
 | General 3 Decal | ||
 | General 4 Decal | ||
 | General 5 Decal | ||
 | General 6 Decal | ||
 | Lance Cpl. 1 Decal | ||
 | Lance Cpl. 2 Decal | ||
 | Lt. Colonel 1 Decal | ||
 | Lt. Colonel 2 Decal | ||
 | Lt. Colonel 3 Decal | ||
 | Lt. Colonel 4 Decal | ||
 | Lt. Colonel 5 Decal | ||
 | Lt. Commander 1 Decal | ||
 | Lt. Commander 2 Decal | ||
 | Lt. Commander 3 Decal | ||
 | Lt. Commander 4 Decal | ||
 | Lt. Commander 5 Decal | ||
 | Lt. General 1 Decal | ||
 | Lt. General 2 Decal | ||
 | Lt. General 3 Decal | ||
 | Lt. General 4 Decal | ||
 | Lt. General 5 Decal | ||
 | Lt. General 6 Decal | ||
 | Maj. General 1 Decal | ||
 | Maj. General 2 Decal | ||
 | Maj. General 3 Decal | ||
 | Maj. General 4 Decal | ||
 | Maj. General 5 Decal | ||
 | Maj. General 6 Decal | ||
 | Major 1 Decal | ||
 | Major 2 Decal | ||
 | Major 3 Decal | ||
 | Major 4 Decal | ||
 | Major 5 Decal | ||
 | Master Sgt. 1 Decal | ||
 | Master Sgt. 2 Decal | ||
 | Master Sgt. 3 Decal | ||
 | Outfit Armor Decal | ||
 | PFC 1 Decal | ||
 | PFC 2 Decal | ||
 | Private Decal | ||
 | Second Lt. 1 Decal | ||
 | Second Lt. 2 Decal | ||
 | Second Lt. 3 Decal | ||
 | Second Lt. 4 Decal | ||
 | Sergeant 1 Decal | ||
 | Sergeant 2 Decal | ||
 | Sergeant 3 Decal | ||
 | Sgt. 1st Class 1 Decal | ||
 | Sgt. 1st Class 2 Decal | ||
 | Sgt. 1st Class 3 Decal | ||
 | Sgt. Major 1 Decal | ||
 | Sgt. Major 2 Decal | ||
 | Sgt. Major 3 Decal | ||
 | Specialist 1 Decal | ||
 | Specialist 2 Decal | ||
 | Staff Sgt. 1 Decal | ||
 | Staff Sgt. 2 Decal | ||
 | Staff Sgt. 3 Decal | ||
 | Tech Sgt. 1 Decal | ||
 | Tech Sgt. 2 Decal | ||
 | Tech Sgt. 3 Decal | ||
 | Warrant Officer 1 Decal | ||
 | Warrant Officer 2 Decal | ||
 | Warrant Officer 3 Decal | ||
 | 6 Years of Loyalty | ||
 | Black Camo | ||
 | Cells Camo | ||
 | Esamir Ice Camo | ||
 | Esamir Snow Camo | ||
 | Snowstorm Camo | ||
| Name | Class/Vehicle | Skillset |
ExecuteScript
Name | Class/Vehicle | Skillset | |
|---|---|---|---|
 | A.S.P. Training | Advanced Specialization Program | |
| Name | Class/Vehicle | Skillset |
Generic
Name | Class/Vehicle | Skillset | |
|---|---|---|---|
 | Assault Rifle Access | Advanced Specialization Program | |
| Carbine Access | Advanced Specialization Program | |
 | Combat Armor Discount | Advanced Specialization Program | |
| Ground Transport Discount | Advanced Specialization Program | |
| Heavy Air Discount | Advanced Specialization Program | |
| Heavy Weapon Secondary | Advanced Specialization Program | |
| Light Air Discount | Advanced Specialization Program | |
| Shotgun Secondary | Advanced Specialization Program | |
| Sidearm Primaries | Advanced Specialization Program | |
 | TR ASF-100 Afterburner | ||
 | Firestorm 1 | ||
| Unknown item (280) | |||
| Name | Class/Vehicle | Skillset |
GiveCurrency
Name | Class/Vehicle | Skillset | |
|---|---|---|---|
 | Bounty Contract | ||
| Name | Class/Vehicle | Skillset |
GiveRewardSet
Name | Class/Vehicle | Skillset | |
|---|---|---|---|
 | Basic Implant Pack | ||
 | ISO-4 Recycler | ||
 | Novice Implant Pack | ||
| Runner-up Implant 1-Pack | ||
| Victory Implant 2-Pack | ||
| Name | Class/Vehicle | Skillset |
ImageSet
Name | Class/Vehicle | Skillset | |
|---|---|---|---|
 | Expert Assault Rifle Banner | ||
 | Expert Carbine Banner | ||
 | Expert LMG Banner | ||
 | Master Assault Rifle Banner | ||
 | Master LMG Banner | ||
 | TR 03 (default) | ||
| Name | Class/Vehicle | Skillset |
Implant
Name | Class/Vehicle | Skillset | |
|---|---|---|---|
 | Combat Surgeon 5 | Universal: Implants | |
 | Mending Field 2 | Universal: Implants | |
 | Electrotech 1 | Universal: Implants | |
 | Robotics Technician 5 | Universal: Implants | |
 | Mobility Mesh 4 | Universal: Implants | |
 | Nanomesh Specialist 1 | Universal: Implants | |
 | Deep Operative 1 | Universal: Implants | |
 | Assassin 4 | Universal: Implants | |
 | Assimilate 1 | Universal: Implants | |
 | Assimilate 5 | Universal: Implants | |
 | Athlete 1 | Universal: Implants | |
 | Athlete 5 | Universal: Implants | |
 | Bionics | Universal: Implants | |
 | Catlike 5 | Universal: Implants | |
 | Critical Chain 3 | Universal: Implants | |
 | Failsafe 1 | Universal: Implants | |
 | Fortify 1 | Universal: Implants | |
 | Gunslinger 1 | Universal: Implants | |
 | Gunslinger 5 | Universal: Implants | |
 | Jockey 1 | Universal: Implants | |
 | Jockey 5 | Universal: Implants | |
 | Nightmare 1 | Universal: Implants | |
 | Ransack 2 | Universal: Implants | |
 | Regeneration 1 | Universal: Implants | |
 | Regeneration 2 | Universal: Implants | |
 | Response Jacket 3 | Universal: Implants | |
 | Sensor Shield 5 | Universal: Implants | |
 | Sidewinder 2 | Universal: Implants | |
 | Survivalist 1 | Universal: Implants | |
 | Survivalist 5 | Universal: Implants | |
 | Symbiote 5 | Universal: Implants | |
 | Vampire 1 | Universal: Implants | |
 | Vampire 5 | Universal: Implants | |
 | Ammo Printer 5 | Universal: Implants | |
 | Avoidance | Universal: Implants | |
 | Battle Hardened 5 | Universal: Implants | |
 | Heavyweight 1 | Universal: Implants | |
 | Infravision | Universal: Implants | |
 | Ocular Shield 3 | Universal: Implants | |
 | Phylactery | Universal: Implants | |
 | Safe Fall 1 | Universal: Implants | |
 | Safe Fall 5 | Universal: Implants | |
 | Safeguard 5 | Universal: Implants | |
 | Sweeper HUD 5 | Universal: Implants | |
 | Target Focus 4 | Universal: Implants | |
 | Aerial Combatant 3 | Universal: Implants | |
 | Paratrooper 3 | Universal: Implants | |
 | Disengage | Universal: Implants | |
 | Salvage 1 | Universal: Implants | |
 | Salvage 4 | Universal: Implants | |
| Name | Class/Vehicle | Skillset |
InfantryCosmetic
Name | Class/Vehicle | Skillset | |
|---|---|---|---|
 | Auraxium Infused Plating | ||
 | Composite Armor | ||
 | Standard Issue Armor | ||
 | TR-M001 Standard Helmet | ||
 | Composite Armor | ||
 | Standard Issue Armor | ||
 | TR-E001 Standard Helmet | ||
 | Composite Armor | ||
 | Standard Issue Armor | ||
 | TR-HA001 Standard Helmet | ||
 | Composite Armor | ||
 | Standard Issue Armor | ||
 | TR-I001 Standard Helmet | ||
 | Haunted Frankenstein Facepaint | ||
 | Haunted Ichabod Crown | ||
 | Haunted Jester Facepaint | ||
 | Haunted Skull Facepaint | ||
 | Terran Holiday Hat | ||
 | Unknown item (801967) | ||
 | Auraxium Infused Plating | ||
 | Composite Armor | ||
 | Standard Issue Armor | ||
 | TR-LA001 Standard Helmet | ||
 | TR-LA002 Standard Helmet | ||
 | Composite Armor | ||
 | TR-MAX001 Standard Helmet | ||
 | TR Greenhorn Voice Pack | ||
| Name | Class/Vehicle | Skillset |
InfantryEquipment
Name | Class/Vehicle | Skillset | |
|---|---|---|---|
 | Nano-Regen Device 1 | Combat Medic: Ability Slot | |
| Nano-Regen Device 2 | Combat Medic: Ability Slot | |
| Nano-Regen Device 3 | Combat Medic: Ability Slot | |
| Nano-Regen Device 4 | Combat Medic: Ability Slot | |
| Nano-Regen Device 5 | Combat Medic: Ability Slot | |
| Nano-Regen Device 6 | Combat Medic: Ability Slot | |
 | Adrenaline Pump | Combat Medic: Suit Slot | |
 | Advanced Shield Capacitor 1 | Combat Medic: Suit Slot | |
| Advanced Shield Capacitor 2 | Combat Medic: Suit Slot | |
| Advanced Shield Capacitor 3 | Combat Medic: Suit Slot | |
| Advanced Shield Capacitor 4 | Combat Medic: Suit Slot | |
| Advanced Shield Capacitor 5 | Combat Medic: Suit Slot | |
 | Ammunition Belt 1 | Combat Medic: Suit Slot | |
| Ammunition Belt 2 | Combat Medic: Suit Slot | |
 | Flak Armor 1 | Combat Medic: Suit Slot | |
| Flak Armor 2 | Combat Medic: Suit Slot | |
| Flak Armor 3 | Combat Medic: Suit Slot | |
| Flak Armor 4 | Combat Medic: Suit Slot | |
| Flak Armor 5 | Combat Medic: Suit Slot | |
 | Grenade Bandolier 1 | Combat Medic: Suit Slot | |
| Grenade Bandolier 2 | Combat Medic: Suit Slot | |
| Grenade Bandolier 3 | Combat Medic: Suit Slot | |
 | Nano-Regen Capacitor | Combat Medic: Suit Slot | |
 | Nanoweave Armor 1 | Combat Medic: Suit Slot | |
| Nanoweave Armor 2 | Combat Medic: Suit Slot | |
| Nanoweave Armor 3 | Combat Medic: Suit Slot | |
| Nanoweave Armor 4 | Combat Medic: Suit Slot | |
| Advanced Shield Capacitor 1 | Engineer: Suit Slot | |
| Advanced Shield Capacitor 2 | Engineer: Suit Slot | |
| Advanced Shield Capacitor 3 | Engineer: Suit Slot | |
| Advanced Shield Capacitor 4 | Engineer: Suit Slot | |
| Advanced Shield Capacitor 5 | Engineer: Suit Slot | |
| Ammunition Belt 1 | Engineer: Suit Slot | |
| Flak Armor 1 | Engineer: Suit Slot | |
| Flak Armor 2 | Engineer: Suit Slot | |
| Flak Armor 3 | Engineer: Suit Slot | |
| Flak Armor 4 | Engineer: Suit Slot | |
| Flak Armor 5 | Engineer: Suit Slot | |
| Grenade Bandolier 1 | Engineer: Suit Slot | |
| Grenade Bandolier 2 | Engineer: Suit Slot | |
| Grenade Bandolier 3 | Engineer: Suit Slot | |
 | Mine Carrier 1 | Engineer: Suit Slot | |
| Mine Carrier 2 | Engineer: Suit Slot | |
| Nanoweave Armor 1 | Engineer: Suit Slot | |
| Nanoweave Armor 2 | Engineer: Suit Slot | |
| Nanoweave Armor 3 | Engineer: Suit Slot | |
 | Adrenaline Shield 1 | Heavy Assault: Ability Slot | |
| Adrenaline Shield 2 | Heavy Assault: Ability Slot | |
| Adrenaline Shield 3 | Heavy Assault: Ability Slot | |
| Adrenaline Shield 4 | Heavy Assault: Ability Slot | |
| Adrenaline Shield 5 | Heavy Assault: Ability Slot | |
 | Nanite Mesh Generator 1 | Heavy Assault: Ability Slot | |
 | Resist Shield 1 | Heavy Assault: Ability Slot | |
| Resist Shield 2 | Heavy Assault: Ability Slot | |
| Resist Shield 3 | Heavy Assault: Ability Slot | |
| Resist Shield 4 | Heavy Assault: Ability Slot | |
| Resist Shield 5 | Heavy Assault: Ability Slot | |
| Advanced Shield Capacitor 1 | Heavy Assault: Suit Slot | |
| Advanced Shield Capacitor 2 | Heavy Assault: Suit Slot | |
| Advanced Shield Capacitor 3 | Heavy Assault: Suit Slot | |
| Advanced Shield Capacitor 4 | Heavy Assault: Suit Slot | |
| Advanced Shield Capacitor 5 | Heavy Assault: Suit Slot | |
| Ammunition Belt 1 | Heavy Assault: Suit Slot | |
| Ammunition Belt 2 | Heavy Assault: Suit Slot | |
| Flak Armor 1 | Heavy Assault: Suit Slot | |
| Flak Armor 2 | Heavy Assault: Suit Slot | |
| Flak Armor 3 | Heavy Assault: Suit Slot | |
| Flak Armor 4 | Heavy Assault: Suit Slot | |
| Flak Armor 5 | Heavy Assault: Suit Slot | |
| Grenade Bandolier 1 | Heavy Assault: Suit Slot | |
| Grenade Bandolier 2 | Heavy Assault: Suit Slot | |
 | Munitions Pouch 1 | Heavy Assault: Suit Slot | |
| Nanoweave Armor 1 | Heavy Assault: Suit Slot | |
| Nanoweave Armor 2 | Heavy Assault: Suit Slot | |
| Nanoweave Armor 3 | Heavy Assault: Suit Slot | |
| Nanoweave Armor 4 | Heavy Assault: Suit Slot | |
| Nanoweave Armor 5 | Heavy Assault: Suit Slot | |
| Hunter Cloaking 1 | Infiltrator: Ability Slot | |
| Hunter Cloaking 2 | Infiltrator: Ability Slot | |
| Hunter Cloaking 3 | Infiltrator: Ability Slot | |
| Hunter Cloaking 4 | Infiltrator: Ability Slot | |
| Hunter Cloaking 5 | Infiltrator: Ability Slot | |
| Hunter Cloaking 6 | Infiltrator: Ability Slot | |
 | Nano-Armor Cloaking 1 | Infiltrator: Ability Slot | |
| Nano-Armor Cloaking 2 | Infiltrator: Ability Slot | |
| Nano-Armor Cloaking 3 | Infiltrator: Ability Slot | |
| Nano-Armor Cloaking 4 | Infiltrator: Ability Slot | |
| Nano-Armor Cloaking 5 | Infiltrator: Ability Slot | |
 | Stalker Cloaking 1 | Infiltrator: Ability Slot | |
| Stalker Cloaking 2 | Infiltrator: Ability Slot | |
| Stalker Cloaking 3 | Infiltrator: Ability Slot | |
| Stalker Cloaking 4 | Infiltrator: Ability Slot | |
| Stalker Cloaking 5 | Infiltrator: Ability Slot | |
| Adrenaline Pump | Infiltrator: Suit Slot | |
 | Chameleon Module | Infiltrator: Suit Slot | |
| Flak Armor 1 | Infiltrator: Suit Slot | |
| Flak Armor 2 | Infiltrator: Suit Slot | |
| Flak Armor 3 | Infiltrator: Suit Slot | |
| Flak Armor 4 | Infiltrator: Suit Slot | |
| Flak Armor 5 | Infiltrator: Suit Slot | |
| Grenade Bandolier 1 | Infiltrator: Suit Slot | |
| Grenade Bandolier 2 | Infiltrator: Suit Slot | |
| Grenade Bandolier 3 | Infiltrator: Suit Slot | |
| Nanoweave Armor 1 | Infiltrator: Suit Slot | |
| Nanoweave Armor 2 | Infiltrator: Suit Slot | |
| Nanoweave Armor 3 | Infiltrator: Suit Slot | |
 | Auxiliary Shield | Universal: Utility Slot | |
 | Legacy - Enhanced Targeting | ||
 | Ambusher Jump Jets 1 | Light Assault: Ability Slot | |
| Ambusher Jump Jets 2 | Light Assault: Ability Slot | |
| Ambusher Jump Jets 3 | Light Assault: Ability Slot | |
| Ambusher Jump Jets 4 | Light Assault: Ability Slot | |
| Ambusher Jump Jets 5 | Light Assault: Ability Slot | |
 | Drifter Jump Jets 1 | Light Assault: Ability Slot | |
| Drifter Jump Jets 2 | Light Assault: Ability Slot | |
| Drifter Jump Jets 3 | Light Assault: Ability Slot | |
| Drifter Jump Jets 4 | Light Assault: Ability Slot | |
| Drifter Jump Jets 5 | Light Assault: Ability Slot | |
 | FREEDOM THRUSTERS | Light Assault: Ability Slot | |
 | Icarus Jump Jets 1 | Light Assault: Ability Slot | |
| Icarus Jump Jets 2 | Light Assault: Ability Slot | |
| Icarus Jump Jets 3 | Light Assault: Ability Slot | |
| Icarus Jump Jets 4 | Light Assault: Ability Slot | |
| Icarus Jump Jets 5 | Light Assault: Ability Slot | |
 | Skirmisher Jump Jets 1 | Light Assault: Ability Slot | |
| Skirmisher Jump Jets 2 | Light Assault: Ability Slot | |
| Skirmisher Jump Jets 3 | Light Assault: Ability Slot | |
| Skirmisher Jump Jets 4 | Light Assault: Ability Slot | |
| Skirmisher Jump Jets 5 | Light Assault: Ability Slot | |
| Skirmisher Jump Jets 6 | Light Assault: Ability Slot | |
| Adrenaline Pump | Light Assault: Suit Slot | |
| Advanced Shield Capacitor 1 | Light Assault: Suit Slot | |
| Advanced Shield Capacitor 2 | Light Assault: Suit Slot | |
| Advanced Shield Capacitor 3 | Light Assault: Suit Slot | |
| Advanced Shield Capacitor 4 | Light Assault: Suit Slot | |
| Advanced Shield Capacitor 5 | Light Assault: Suit Slot | |
| Ammunition Belt 1 | Light Assault: Suit Slot | |
| Ammunition Belt 2 | Light Assault: Suit Slot | |
| Flak Armor 1 | Light Assault: Suit Slot | |
| Flak Armor 2 | Light Assault: Suit Slot | |
| Flak Armor 3 | Light Assault: Suit Slot | |
| Flak Armor 4 | Light Assault: Suit Slot | |
| Flak Armor 5 | Light Assault: Suit Slot | |
| Grenade Bandolier 1 | Light Assault: Suit Slot | |
| Grenade Bandolier 2 | Light Assault: Suit Slot | |
| Grenade Bandolier 3 | Light Assault: Suit Slot | |
| Nanoweave Armor 1 | Light Assault: Suit Slot | |
| Nanoweave Armor 2 | Light Assault: Suit Slot | |
| Nanoweave Armor 3 | Light Assault: Suit Slot | |
 | TR Turret Shield | ||
 | Emergency Repair 1 | MAX: Ability Slot | |
| Emergency Repair 2 | MAX: Ability Slot | |
| Emergency Repair 3 | MAX: Ability Slot | |
| Emergency Repair 4 | MAX: Ability Slot | |
| Emergency Repair 5 | MAX: Ability Slot | |
| Emergency Repair 6 | MAX: Ability Slot | |
 | Lockdown 1 | MAX: Ability Slot | |
 | Kinetic Armor 1 | MAX: Suit Slot | |
| Kinetic Armor 2 | MAX: Suit Slot | |
| Kinetic Armor 3 | MAX: Suit Slot | |
 | Ordnance Armor 1 | MAX: Suit Slot | |
| Ordnance Armor 2 | MAX: Suit Slot | |
| Ordnance Armor 3 | MAX: Suit Slot | |
| Ordnance Armor 4 | MAX: Suit Slot | |
| Ordnance Armor 5 | MAX: Suit Slot | |
| Nano-Regen Device 1 | Combat Medic: Ability Slot | |
| Nano-Regen Device 1 | Combat Medic: Ability Slot | |
| Nano-Regen Capacitor | Combat Medic: Suit Slot | |
| Nano-Regen Capacitor | Combat Medic: Suit Slot | |
| Nanoweave Armor 1 | Combat Medic: Suit Slot | |
| Nanoweave Armor 1 | Combat Medic: Suit Slot | |
| Nanite Mesh Generator 1 | Heavy Assault: Ability Slot | |
| Nanite Mesh Generator 1 | Heavy Assault: Ability Slot | |
| Munitions Pouch 1 | Heavy Assault: Suit Slot | |
| Munitions Pouch 1 | Heavy Assault: Suit Slot | |
| Nanoweave Armor 1 | Heavy Assault: Suit Slot | |
| Nanoweave Armor 1 | Heavy Assault: Suit Slot | |
| Nanoweave Armor 2 | Heavy Assault: Suit Slot | |
| Nanoweave Armor 2 | Heavy Assault: Suit Slot | |
| Nanoweave Armor 3 | Heavy Assault: Suit Slot | |
| Nanoweave Armor 3 | Heavy Assault: Suit Slot | |
| Nanoweave Armor 4 | Heavy Assault: Suit Slot | |
| Nanoweave Armor 4 | Heavy Assault: Suit Slot | |
| Nanoweave Armor 5 | Heavy Assault: Suit Slot | |
| Nanoweave Armor 5 | Heavy Assault: Suit Slot | |
| Hunter Cloaking 1 | Infiltrator: Ability Slot | |
| Hunter Cloaking 1 | Infiltrator: Ability Slot | |
| Stalker Cloaking 1 | Infiltrator: Ability Slot | |
| Stalker Cloaking 1 | Infiltrator: Ability Slot | |
| Chameleon Module | Infiltrator: Suit Slot | |
| Chameleon Module | Infiltrator: Suit Slot | |
| Skirmisher Jump Jets 1 | Light Assault: Ability Slot | |
| Skirmisher Jump Jets 1 | Light Assault: Ability Slot | |
| Ammunition Belt 1 | Light Assault: Suit Slot | |
| Ammunition Belt 1 | Light Assault: Suit Slot | |
 | Aegis Shield 1 | MAX: Ability Slot | |
| Emergency Repair 1 | MAX: Ability Slot | |
| Emergency Repair 1 | MAX: Ability Slot | |
 | Zealot Overdrive Engine 1 | MAX: Ability Slot | |
| Kinetic Armor 1 | MAX: Suit Slot | |
| Kinetic Armor 1 | MAX: Suit Slot | |
| Ordnance Armor 1 | MAX: Suit Slot | |
| Ordnance Armor 1 | MAX: Suit Slot | |
| Auxiliary Shield | Universal: Utility Slot | |
| Auxiliary Shield | Universal: Utility Slot | |
| Name | Class/Vehicle | Skillset |
LoadoutTab
Name | Class/Vehicle | Skillset | |
|---|---|---|---|
 | Custom Infantry Loadout | ||
| Custom Vehicle Loadout | ||
| Name | Class/Vehicle | Skillset |
UnlockPlayerTitle
Name | Class/Vehicle | Skillset | |
|---|---|---|---|
 | Captain | ||
| Colonel | ||
| Comm. Sgt. Major | ||
| Commander | ||
| Commissar | ||
| Corporal | ||
| Field Marshal | ||
| First Lt. | ||
| First Sgt. | ||
| General | ||
| Lance Cpl. | ||
| Lt. Colonel | ||
| Lt. Commander | ||
| Lt. General | ||
| Maj. General | ||
| Major | ||
| Master Sgt. | ||
| PFC | ||
| Second Lt. | ||
| Sergeant | ||
| Sgt. 1st Class | ||
| Sgt. Major | ||
| Specialist | ||
| Staff Sgt. | ||
| Tech Sgt. | ||
| Title: A.S.P. Operative | |||
| Title: Bounty Hunter | ||
| Title: Myriad | |||
| Warrant Officer | ||
| Name | Class/Vehicle | Skillset |
VehicleCosmetic
Name | Class/Vehicle | Skillset | |
|---|---|---|---|
 | ANT NS-A Horn | ||
 | Headlights | ||
| Flash NS-A Horn | ||
 | Headlights | ||
 | Cert Explosion Horn | ||
 | Cockpit: Standard Glass | ||
 | Galaxy Intake | ||
| Galaxy NS-A Horn | ||
 | Razor Fins | ||
| Harasser NS-A Horn | ||
| Headlights | ||
 | White Chassis Lights | ||
| Cockpit: Standard Glass | ||
| Liberator NS-A Horn | ||
 | Viper Fins | ||
| Headlights | ||
| Lightning NS-A Horn | ||
 | Auraxium Lumifiber Trim | ||
| Cockpit: Standard Glass | ||
 | Cockpit: Tiger Face Decal | ||
| Mosquito NS-A Horn | ||
| Headlights | ||
 | Martial Plating | ||
| Prowler NS-A Horn | ||
| Headlights | ||
| Sunderer NS-A Horn | ||
| Cockpit: Standard Glass | ||
| Valkyrie NS-A Horn | ||
| Name | Class/Vehicle | Skillset |
VehicleEquipment
Name | Class/Vehicle | Skillset | |
|---|---|---|---|
 | Racer High Speed Chassis 1 | ANT Performance Slot | |
| Racer High Speed Chassis 2 | ANT Performance Slot | |
| Racer High Speed Chassis 3 | ANT Performance Slot | |
 | Nanite Auto Repair System 1 | ANT: Defense Slot | |
 | Vehicle Stealth 1 | ANT: Defense Slot | |
| Vehicle Stealth 2 | ANT: Defense Slot | |
| Vehicle Stealth 3 | ANT: Defense Slot | |
 | C300 Turbo Engine 1 | ANT: Utility Slot | |
| Fire Suppression 1 | ANT: Utility Slot | |
| Fire Suppression 2 | ANT: Utility Slot | |
| Fire Suppression 3 | ANT: Utility Slot | |
| Fire Suppression 4 | ANT: Utility Slot | |
 | Scout Radar 1 | ANT: Utility Slot | |
| Scout Radar 2 | ANT: Utility Slot | |
| Scout Radar 3 | ANT: Utility Slot | |
| Scout Radar 4 | ANT: Utility Slot | |
 | Mine Guard 1 | Flash: Defense Slot | |
| Mine Guard 2 | Flash: Defense Slot | |
| Mine Guard 3 | Flash: Defense Slot | |
| Mine Guard 4 | Flash: Defense Slot | |
| Nanite Auto Repair System 1 | Flash: Defense Slot | |
| Nanite Auto Repair System 2 | Flash: Defense Slot | |
| Nanite Auto Repair System 3 | Flash: Defense Slot | |
| Nanite Auto Repair System 4 | Flash: Defense Slot | |
| Racer High Speed Chassis 1 | Flash: Performance Slot | |
| Racer High Speed Chassis 2 | Flash: Performance Slot | |
| Racer High Speed Chassis 3 | Flash: Performance Slot | |
| Fire Suppression 1 | Flash: Utility Slot | |
| Fire Suppression 2 | Flash: Utility Slot | |
| Fire Suppression 3 | Flash: Utility Slot | |
| Fire Suppression 4 | Flash: Utility Slot | |
 | Gate Shield Diffuser 1 | Flash: Utility Slot | |
| Gate Shield Diffuser 2 | Flash: Utility Slot | |
| Gate Shield Diffuser 3 | Flash: Utility Slot | |
| Gate Shield Diffuser 4 | Flash: Utility Slot | |
 | Scout Radar 1 | Flash: Utility Slot | |
| Scout Radar 2 | Flash: Utility Slot | |
| Scout Radar 3 | Flash: Utility Slot | |
| Scout Radar 4 | Flash: Utility Slot | |
 | Wraith Cloaking Device 1 | Flash: Utility Slot | |
| Wraith Cloaking Device 2 | Flash: Utility Slot | |
| Wraith Cloaking Device 3 | Flash: Utility Slot | |
| Wraith Cloaking Device 4 | Flash: Utility Slot | |
 | Composite Armor 1 | Galaxy: Defense Slot | |
| Composite Armor 2 | Galaxy: Defense Slot | |
| Composite Armor 3 | Galaxy: Defense Slot | |
| Composite Armor 4 | Galaxy: Defense Slot | |
 | Lockon Jamming Field 1 | Galaxy: Defense Slot | |
| Lockon Jamming Field 2 | Galaxy: Defense Slot | |
| Lockon Jamming Field 3 | Galaxy: Defense Slot | |
| Lockon Jamming Field 4 | Galaxy: Defense Slot | |
| Nanite Auto Repair System 1 | Galaxy: Defense Slot | |
| Nanite Auto Repair System 2 | Galaxy: Defense Slot | |
| Nanite Auto Repair System 3 | Galaxy: Defense Slot | |
| Nanite Auto Repair System 4 | Galaxy: Defense Slot | |
| Nanite Auto Repair System 5 | Galaxy: Defense Slot | |
 | Nanite Proximity Repair System 1 | Galaxy: Defense Slot | |
| Nanite Proximity Repair System 2 | Galaxy: Defense Slot | |
| Nanite Proximity Repair System 3 | Galaxy: Defense Slot | |
| Nanite Proximity Repair System 4 | Galaxy: Defense Slot | |
| Nanite Proximity Repair System 5 | Galaxy: Defense Slot | |
| Nanite Proximity Repair System 6 | Galaxy: Defense Slot | |
 | Vehicle Ammo Dispenser 1 | Galaxy: Defense Slot | |
| Vehicle Ammo Dispenser 2 | Galaxy: Defense Slot | |
| Vehicle Ammo Dispenser 3 | Galaxy: Defense Slot | |
| Vehicle Ammo Dispenser 4 | Galaxy: Defense Slot | |
| Vehicle Stealth 1 | Galaxy: Defense Slot | |
| Vehicle Stealth 2 | Galaxy: Defense Slot | |
| Vehicle Stealth 3 | Galaxy: Defense Slot | |
| Vehicle Stealth 4 | Galaxy: Defense Slot | |
 | High-G Airframe 1 | Galaxy: Performance Slot | |
| High-G Airframe 2 | Galaxy: Performance Slot | |
| High-G Airframe 3 | Galaxy: Performance Slot | |
| Fire Suppression 1 | Galaxy: Utility Slot | |
| Fire Suppression 2 | Galaxy: Utility Slot | |
| Fire Suppression 3 | Galaxy: Utility Slot | |
| Fire Suppression 4 | Galaxy: Utility Slot | |
 | Composite Armor 1 | Harasser: Defense Slot | |
| Composite Armor 2 | Harasser: Defense Slot | |
| Nanite Auto Repair System 1 | Harasser: Defense Slot | |
| Nanite Auto Repair System 2 | Harasser: Defense Slot | |
| Nanite Auto Repair System 3 | Harasser: Defense Slot | |
| Nanite Auto Repair System 4 | Harasser: Defense Slot | |
| Nanite Auto Repair System 5 | Harasser: Defense Slot | |
| Vehicle Stealth 1 | Harasser: Defense Slot | |
| Vehicle Stealth 2 | Harasser: Defense Slot | |
| Vehicle Stealth 3 | Harasser: Defense Slot | |
| Vehicle Stealth 4 | Harasser: Defense Slot | |
| Racer High Speed Chassis 1 | Harasser: Performance Slot | |
| Racer High Speed Chassis 2 | Harasser: Performance Slot | |
| Racer High Speed Chassis 3 | Harasser: Performance Slot | |
 | Scrapper Combat Chassis 1 | Harasser: Performance Slot | |
 | Surger Power Chassis 1 | Harasser: Performance Slot | |
| Surger Power Chassis 2 | Harasser: Performance Slot | |
| Fire Suppression 1 | Harasser: Utility Slot | |
| Fire Suppression 2 | Harasser: Utility Slot | |
| Fire Suppression 3 | Harasser: Utility Slot | |
| Fire Suppression 4 | Harasser: Utility Slot | |
| Gate Shield Diffuser 1 | Harasser: Utility Slot | |
| Gate Shield Diffuser 2 | Harasser: Utility Slot | |
| Gate Shield Diffuser 3 | Harasser: Utility Slot | |
| Nanite Auto Repair System 1 | Liberator: Defense Slot | |
| Vehicle Stealth 1 | Liberator: Defense Slot | |
| Vehicle Stealth 2 | Liberator: Defense Slot | |
| Vehicle Stealth 3 | Liberator: Defense Slot | |
| Vehicle Stealth 4 | Liberator: Defense Slot | |
 | LF-100 Afterburner 2 | Liberator: Passive Systems | |
| LF-100 Afterburner 3 | Liberator: Passive Systems | |
| LF-100 Afterburner 4 | Liberator: Passive Systems | |
| LF-100 Afterburner 5 | Liberator: Passive Systems | |
| High-G Airframe 1 | Liberator: Performance Slot | |
| High-G Airframe 2 | Liberator: Performance Slot | |
| High-G Airframe 3 | Liberator: Performance Slot | |
 | Precision Bomber Airframe 1 | Liberator: Performance Slot | |
| Precision Bomber Airframe 2 | Liberator: Performance Slot | |
| Precision Bomber Airframe 3 | Liberator: Performance Slot | |
| Fire Suppression 1 | Liberator: Utility Slot | |
| Fire Suppression 2 | Liberator: Utility Slot | |
| Fire Suppression 3 | Liberator: Utility Slot | |
| Fire Suppression 4 | Liberator: Utility Slot | |
| LF-100 Afterburner 1 | ||
| Nanite Auto Repair System 1 | Lightning: Defense Slot | |
| Vehicle Stealth 1 | Lightning: Defense Slot | |
| Vehicle Stealth 2 | Lightning: Defense Slot | |
| Vehicle Stealth 3 | Lightning: Defense Slot | |
| Vehicle Stealth 4 | Lightning: Defense Slot | |
| Racer High Speed Chassis 1 | Lightning: Performance Slot | |
| Racer High Speed Chassis 2 | Lightning: Performance Slot | |
| Racer High Speed Chassis 3 | Lightning: Performance Slot | |
| Fire Suppression 1 | Lightning: Utility Slot | |
| Fire Suppression 2 | Lightning: Utility Slot | |
| Fire Suppression 3 | Lightning: Utility Slot | |
| Fire Suppression 4 | Lightning: Utility Slot | |
| Composite Armor 1 | Mosquito: Defense Slot | |
| Composite Armor 2 | Mosquito: Defense Slot | |
| Composite Armor 3 | Mosquito: Defense Slot | |
| Composite Armor 4 | Mosquito: Defense Slot | |
| Nanite Auto Repair System 1 | Mosquito: Defense Slot | |
| Nanite Auto Repair System 2 | Mosquito: Defense Slot | |
| Nanite Auto Repair System 3 | Mosquito: Defense Slot | |
| Nanite Auto Repair System 4 | Mosquito: Defense Slot | |
| Nanite Auto Repair System 5 | Mosquito: Defense Slot | |
| Vehicle Stealth 1 | Mosquito: Defense Slot | |
| Vehicle Stealth 2 | Mosquito: Defense Slot | |
| Vehicle Stealth 3 | Mosquito: Defense Slot | |
| Vehicle Stealth 4 | Mosquito: Defense Slot | |
 | Engagement Radar | Mosquito: Passive Systems | |
 | Hover Stability Airframe 1 | Mosquito: Performance Slot | |
| Hover Stability Airframe 2 | Mosquito: Performance Slot | |
| Hover Stability Airframe 3 | Mosquito: Performance Slot | |
 | Racer High Speed Airframe 1 | Mosquito: Performance Slot | |
| Racer High Speed Airframe 2 | Mosquito: Performance Slot | |
| Racer High Speed Airframe 3 | Mosquito: Performance Slot | |
 | Decoy Flares 1 | Mosquito: Utility Slot | |
| Decoy Flares 2 | Mosquito: Utility Slot | |
| Decoy Flares 3 | Mosquito: Utility Slot | |
 | Ejection System | Mosquito: Utility Slot | |
| Fire Suppression 1 | Mosquito: Utility Slot | |
| Fire Suppression 2 | Mosquito: Utility Slot | |
| Fire Suppression 3 | Mosquito: Utility Slot | |
| Fire Suppression 4 | Mosquito: Utility Slot | |
 | External Fuel Tanks | ||
| High-Capacity Fuel Tanks | ||
| Quick-Recharge Fuel Tanks | ||
| Nanite Auto Repair System 1 | Prowler: Defense Slot | |
| Nanite Auto Repair System 2 | Prowler: Defense Slot | |
| Nanite Auto Repair System 3 | Prowler: Defense Slot | |
| Nanite Auto Repair System 4 | Prowler: Defense Slot | |
| Nanite Auto Repair System 5 | Prowler: Defense Slot | |
| Vehicle Stealth 1 | Prowler: Defense Slot | |
| Vehicle Stealth 2 | Prowler: Defense Slot | |
| Vehicle Stealth 3 | Prowler: Defense Slot | |
| Vehicle Stealth 4 | Prowler: Defense Slot | |
| Anchored Mode | Prowler: Passive Systems | |
| Racer High Speed Chassis 1 | Prowler: Performance Slot | |
| Racer High Speed Chassis 2 | Prowler: Performance Slot | |
| Racer High Speed Chassis 3 | Prowler: Performance Slot | |
| Rival Combat Chassis 1 | Prowler: Performance Slot | |
| Rival Combat Chassis 2 | Prowler: Performance Slot | |
| Rival Combat Chassis 3 | Prowler: Performance Slot | |
 | Barrage 1 | Prowler: Utility Slot | |
| Barrage 2 | Prowler: Utility Slot | |
| Barrage 3 | Prowler: Utility Slot | |
| Barrage 4 | Prowler: Utility Slot | |
| Fire Suppression 1 | Prowler: Utility Slot | |
| Fire Suppression 2 | Prowler: Utility Slot | |
| Fire Suppression 3 | Prowler: Utility Slot | |
| Fire Suppression 4 | Prowler: Utility Slot | |
| Stealth Cloaking Module | Sunderer: Defense Slot | |
| Vehicle Stealth 1 | Sunderer: Defense Slot | |
| Vehicle Stealth 2 | Sunderer: Defense Slot | |
| Vehicle Stealth 3 | Sunderer: Defense Slot | |
| Vehicle Stealth 4 | Sunderer: Defense Slot | |
| Nanite Auto Repair System 1 | Valkyrie: Defense Slot | |
| Vehicle Stealth 1 | Valkyrie: Defense Slot | |
| Vehicle Stealth 2 | Valkyrie: Defense Slot | |
| Vehicle Stealth 3 | Valkyrie: Defense Slot | |
| Vehicle Stealth 4 | Valkyrie: Defense Slot | |
| Evasiveness Airframe 1 | Valkyrie: Performance Slot | |
| Evasiveness Airframe 2 | Valkyrie: Performance Slot | |
| Evasiveness Airframe 3 | Valkyrie: Performance Slot | |
| Fire Suppression 1 | Valkyrie: Utility Slot | |
| Fire Suppression 2 | Valkyrie: Utility Slot | |
| Fire Suppression 3 | Valkyrie: Utility Slot | |
| Fire Suppression 4 | Valkyrie: Utility Slot | |
| Scout Radar 1 | Valkyrie: Utility Slot | |
| Scout Radar 2 | Valkyrie: Utility Slot | |
| Scout Radar 3 | Valkyrie: Utility Slot | |
| Scout Radar 4 | Valkyrie: Utility Slot | |
| Nanite Auto Repair System 1 | Magrider: Defense Slot | |
| Fire Suppression 1 | Magrider: Utility Slot | |
 | Magburner 1 | Magrider: Utility Slot | |
| Nanite Auto Repair System 1 | Reaver: Defense Slot | |
| Fire Suppression 1 | Reaver: Utility Slot | |
| Nanite Auto Repair System 1 | Scythe: Defense Slot | |
| Fire Suppression 1 | Scythe: Utility Slot | |
| Nanite Auto Repair System 1 | Vanguard: Defense Slot | |
| Fire Suppression 1 | Vanguard: Utility Slot | |
| Name | Class/Vehicle | Skillset |
Weapon
Name | Class/Vehicle | Skillset | |
|---|---|---|---|
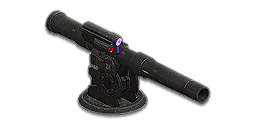
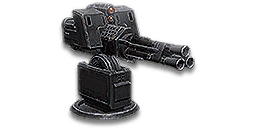 | G30 Walker | TOP WEAPON: G30 Walker | |
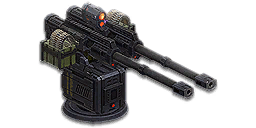
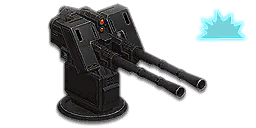
 | M12 Kobalt | TOP WEAPON: M12 Kobalt | |
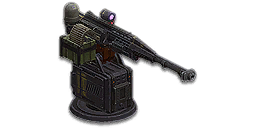
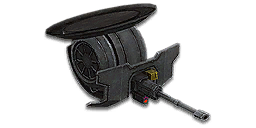
 | M20 Basilisk | TOP WEAPON: M20 Basilisk | |
 | WLT-Mandible Mining Laser | ||
 | WLT-Yellowjacket Mining Laser | ||
 | Shield Recharging Field | Combat Medic: Ability Slot | |
| Shield Recharging Field | Combat Medic: Ability Slot | |
| Shield Recharging Field | Combat Medic: Ability Slot | |
| Shield Recharging Field | Combat Medic: Ability Slot | |
 | Nanite Revive Grenade | Combat Medic: Grenade Slot | |
 | Nano-Regen Grenade | Combat Medic: Grenade Slot | |
 | Medical Applicator 1 | Combat Medic: Tool Slot | |
| Medical Applicator 2 | Combat Medic: Tool Slot | |
| Medical Applicator 3 | Combat Medic: Tool Slot | |
| Medical Applicator 4 | Combat Medic: Tool Slot | |
| Medical Applicator 5 | Combat Medic: Tool Slot | |
| Medical Applicator 6 | Combat Medic: Tool Slot | |
 | T1A Unity | ||
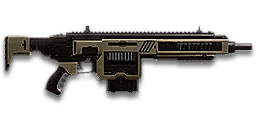
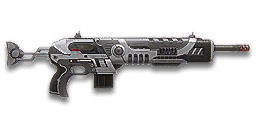 | TORQ-9 | Primary: Assault Rifle: CQR-40 | |
 | Cycler TRV | Primary: Assault Rifle: Cycler TRV | |
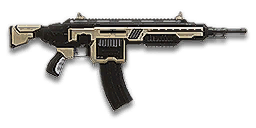
 | NS-11A | Primary: Assault Rifle: NS-11A | |
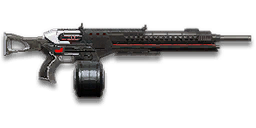
 | SABR-13 | Primary: Assault Rifle: SABR-13 | |
 | T1 Cycler | Primary: Assault Rifle: T1 Cycler | |
 | T1S Cycler | Primary: Assault Rifle: T1S Cycler | |
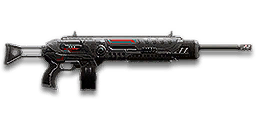
 | TAR | Primary: Assault Rifle: TAR | |
 | NSX Yumi | ||
 | Ammunition Package 1 | Engineer: Ability Slot | |
| Ammunition Package 1 | Engineer: Ability Slot | |
| Ammunition Package 2 | Engineer: Ability Slot | |
| Ammunition Package 3 | Engineer: Ability Slot | |
| Ammunition Package 4 | Engineer: Ability Slot | |
| Ammunition Package 5 | Engineer: Ability Slot | |
| Ammunition Package 6 | Engineer: Ability Slot | |
 | Anti-Infantry MANA Turret | Engineer: Ability Slot | |
 | Anti-Vehicle MANA Turret | Engineer: Ability: Anti-Vehicle MANA Turret | |
 | Spitfire Auto-Turret | Engineer: Ability: Spitfire Auto-Turret | |
 | Nano-Repair Grenade | Engineer: Grenade Slot | |
 | Nano-Armor Kit 1 | Engineer: Tool Slot | |
| Nano-Armor Kit 2 | Engineer: Tool Slot | |
| Nano-Armor Kit 3 | Engineer: Tool Slot | |
| Nano-Armor Kit 4 | Engineer: Tool Slot | |
| Nano-Armor Kit 5 | Engineer: Tool Slot | |
| Nano-Armor Kit 6 | Engineer: Tool Slot | |
 | Tank Mine | Engineer: Utility Slot | |
 | Hardlight Barrier | ||
 | NS-AM7 Archer | ||
 | Anti-Vehicle Grenade | Heavy Assault: Grenade Slot | |
| Reserve Hardlight Barrier | Heavy Assault: Utility Slot | |
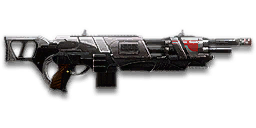
 | MSW-R | Primary: LMG: MSW-R | |
 | T9 CARV | Primary: LMG: T9 CARV | |
 | T9 CARV-S | Primary: LMG: T9 CARV-S | |
 | T16 Rhino | Primary: LMG: T16 | |
 | T32 Bull | Primary: LMG: T32 Bull | |
 | TMG-50 | Primary: LMG: TMG-50 | |
 | NS-15M2 | ||
 | M40 Fury-F | PRIMARY WEAPON: M40 Fury-F | |
 | M20 Drake | LEFT WEAPON: M20 Drake | |
| M20 Drake | RIGHT WEAPON: M20 Drake | |
| M20 Drake | TAIL WEAPON: M20 Drake | |
| M20 Drake | TOP WEAPON: M20 Drake | |
 | E540 Halberd-H | TOP WEAPON: E540 Halberd-H | |
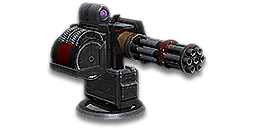 | G20 Vulcan-H | TOP WEAPON: G30 Vulcan-H | |
 | G40-F Ranger | TOP WEAPON: G40-F Ranger | |
| M12 Kobalt-H | TOP WEAPON: M12 Kobalt-H | |
| M20 Basilisk-H | TOP WEAPON: M20 Basilisk-H | |
 | M40 Fury-H | TOP WEAPON: M40 Fury-H | |
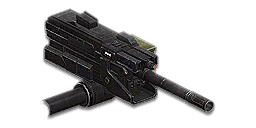
 | T7 Mini-Chaingun | Primary: Heavy Weapon: T7 Mini-Chaingun | |
 | ASP-30 Grounder | Tool: Rocket Launcher: ASP-30 Grounder | |
 | T2 Striker | Tool: Rocket Launcher: T2 Striker | |
| ML-7 | ||
 | NS-15 Gallows | ||
 | T9A "Butcher" | ||
 | Motion Spotter 1 | Infiltrator: Tool Slot | |
| Motion Spotter 2 | Infiltrator: Tool Slot | |
| Motion Spotter 3 | Infiltrator: Tool Slot | |
| Motion Spotter 4 | Infiltrator: Tool Slot | |
| Motion Spotter 5 | Infiltrator: Tool Slot | |
 | Recon Detection Device 1 | Infiltrator: Tool Slot | |
| Recon Detection Device 2 | Infiltrator: Tool Slot | |
| Recon Detection Device 3 | Infiltrator: Tool Slot | |
| Recon Detection Device 4 | Infiltrator: Tool Slot | |
| Recon Detection Device 5 | Infiltrator: Tool Slot | |
| Recon Detection Device 6 | Infiltrator: Tool Slot | |
 | 99SV | Primary: Sniper Rifle: 99SV | |
 | M77-B | Primary: Sniper Rifle: M77-B | |
 | TSAR-42 | Primary: Sniper Rifle: TSAR-42 | |
 | NS-30 Vandal | Secondary: Pistol: NS-44P Commissioner | |
 | Sticky Grenade | Engineer: Grenade Slot | |
 | EMP Grenade | Infiltrator: Grenade Slot | |
 | Claymore | Infiltrator: Utility Slot | |
 | HC1 Cougar | Primary: Carbine: CBR-7 | |
 | LC2 Lynx | Primary: Carbine: LC2 Lynx | |
 | LC3 Jaguar | Primary: Carbine: LC3 Jaguar | |
 | NS-11C | Primary: Carbine: NS-11C | |
 | TRAC-5 | Primary: Carbine: TRAC-5 | |
 | TRAC-5 Burst | Primary: Carbine: TRAC-5 Burst | |
 | TRAC-5 S | Primary: Carbine: TRAC-5 S | |
 | NSX-P Tanto | ||
 | NS-45 Pilot | 2016 Holiday Countdown Day 1 | |
 | Water Balloon | [NOSTR] 6004505 (1300478554) | |
 | Hunter QCX | Hunter QCX | |
 | MKV Suppressed | Hunter QCX | |
 | SMG-46 Armistice | Primary: SMG: SMG-46 Armistice | |
 | NS-44 Commissioner | Secondary: Pistol: NS-44 Commissioner | |
 | TX1 Repeater | Secondary: Pistol: TX1 Repeater | |
 | Spawn Beacon | Universal: Squad Leader | |
 | Bending Beacon | Universal: Utility Slot | |
 | Medical Kit | Universal: Utility Slot | |
| Restoration Kit | Universal: Utility Slot | |
 | Bunker | ||
 | Chainblade | ||
 | Cortium Silo | ||
 | Ectoblaster | ||
 | Frag Grenade | ||
 | HIVE | ||
 | Hoplon Anti-Aircraft Phalanx Tower | ||
 | Icikill | ||
 | Light Air Terminal | ||
 | Light Vehicle Terminal | ||
 | NS-44L Showdown | ||
 | NS-357 IA | ||
 | NSX Amaterasu | ||
 | Orbital Strike Uplink | ||
 | Rampart Wall | ||
 | Recon Array | ||
 | Repair Module | ||
 | Router | ||
 | Routing Spire | ||
 | Sentinel Relay | ||
 | Skywall Shield Emitter | ||
 | Soldier Soaker | ||
 | Solid Wall | ||
 | Spear Anti-Vehicle Tower | ||
 | Structure Shield Module | ||
 | The Flail | ||
 | The Slasher | ||
 | Turret AI Module | ||
 | Vehicle Ammo Dispenser | ||
 | Vehicle Gate | ||
 | Vehicle Ramp | ||
 | Welding Device | ||
 | Xiphos Anti-Infantry Tower | ||
 | Flash Grenade | Heavy Assault: Grenade Slot | |
 | AP30 Shredder | BELLY WEAPON: AP30 Shredder | |
 | C150 Dalton | BELLY WEAPON: C150 Dalton | |
 | Dual-75 Duster | BELLY WEAPON: Dual-75 Duster | |
 | L105 Zephyr | BELLY WEAPON: L105 Zephyr | |
 | CAS30 Tank Buster | NOSE WEAPON: CAS30 Tank Buster | |
 | L-24R Spur | NOSE WEAPON: L-24R Spur | |
 | L-30R Vektor | NOSE WEAPON: L-30R Vektor | |
 | A30 Walker | TAIL WEAPON: A30 Walker | |
 | Hyena Missile Launcher | TAIL WEAPON: Hyena Missile Launcher | |
| M20 Drake | TAIL WEAPON: M20 Drake | |
 | M60-A Bulldog | TAIL WEAPON: M60-A Bulldog | |
 | Quick-Det Flash Grenade | Light Assault: Grenade Slot | |
 | Rocklet Rifle | ||
 | NS Baron G5 | AF-4A Bandit | |
 | C-4 | Heavy Assault: Utility Slot | |
 | AS16 NightHawk | Primary: Shotgun: AS16 NightHawk | |
 | FA1 Barrage | Primary: Shotgun: FA1 Barrage | |
 | TAS-16 Blackjack | Primary: Shotgun: TAS-16 Blackjack | |
 | TRS-12 Uppercut | Primary: Shotgun: TRS-12 Uppercut | |
 | TS4 Haymaker | Primary: Shotgun: TS4 Haymaker | |
 | Concussion Grenade | Heavy Assault: Grenade Slot | |
 | C75 Viper | PRIMARY WEAPON: C75 Viper | |
 | L100 Python HEAT | PRIMARY WEAPON: L100 Python HEAT | |
 | L100 Python HESH | PRIMARY WEAPON: L100 Python HESH | |
 | MANA Anti-Infantry Turret | ||
 | MANA Anti-Vehicle Turret | Engineer: Ability: Anti-Vehicle MANA Turret | |
 | M1 Heavy Cycler | Primary Left: Anti-Infantry: M1 Heavy Cycler | |
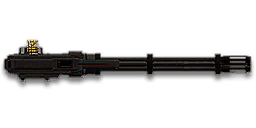 | MRC3 Mercy | Primary Left: Anti-Infantry: MRC3 Mercy | |
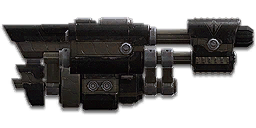 | M3 Pounder HEG | Primary Left: Anti-Vehicle: M3 Pounder HEG | |
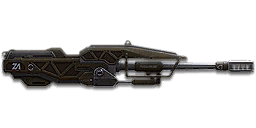 | NS-10 Burster | Primary Right: Anti-Air: NS-10 Burster | |
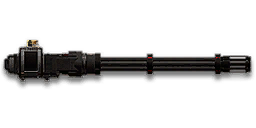 | MRC3 Mercy | Primary Right: Anti-Infantry: MRC3 Mercy | |
| M3 Pounder HEG | Primary Right: Anti-Vehicle: M3 Pounder HEG | |
 | MAX Punch | ||
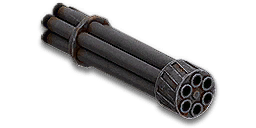 | M14 Banshee | NOSE CANNON: M14 Banshee | |
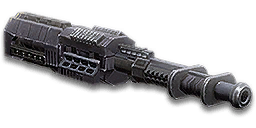 | M18 Locust | NOSE CANNON: M18 Locust | |
 | M18 Needler | NOSE CANNON: M18 Needler | |
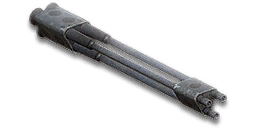 | M18 Rotary | NOSE CANNON: M18 Rotary | |
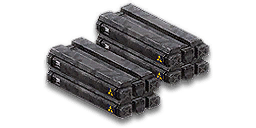 | Hellfire Rocket Pods | WING MOUNT: Hellfire Rocket Pods | |
 | Tomcat A2AM Pods | WING MOUNT: Tomcat A2AM Pods | |
 | Hornet Missiles | WING MOUNT: Hornet Missiles | |
| E540 Halberd | GUNNER WEAPON: E540 Halberd | |
| G40-F Ranger | GUNNER WEAPON: G40-F Ranger | |
| M12 Kobalt | GUNNER WEAPON: M12 Kobalt | |
| M20 Basilisk | GUNNER WEAPON: M20 Basilisk | |
 | MR11 Gatekeeper | MR11 Gatekeeper | |
 | P2-120 AP | PRIMARY WEAPON: P2-120 AP | |
 | P2-120 HEAT | PRIMARY WEAPON: P2-120 HEAT | |
 | P2-120 HESH | PRIMARY WEAPON: P2-120 HESH | |
| G40-F Ranger | FRONT WEAPON: G40-F Ranger | |
| M12 Kobalt | FRONT WEAPON: M12 Kobalt | |
| M20 Basilisk | FRONT WEAPON: M20 Basilisk | |
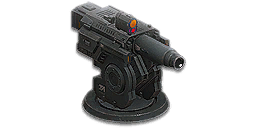 | M60-G Bulldog | FRONT WEAPON: M60-G Bulldog | |
| G40-F Ranger | REAR WEAPON: G40-F Ranger | |
| M12 Kobalt | REAR WEAPON: M12 Kobalt | |
| M20 Basilisk | REAR WEAPON: M20 Basilisk | |
| M60-G Bulldog | REAR WEAPON: M60-G Bulldog | |
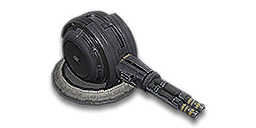 | CAS 14-E | CAS 14-E | |
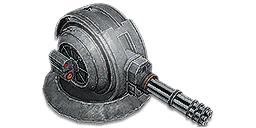 | Hellion G20 | Hellion G20 | |
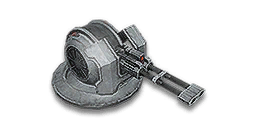 | M20 Wyvern | M20 Wyvern | |
 | Xiphos Anti-Infantry Phalanx Turret | ||
| C150 Dalton | BELLY WEAPON: C150 Dalton | |
| C150 Dalton | BELLY WEAPON: C150 Dalton | |
| Dual-75 Duster | BELLY WEAPON: Dual-75 Duster | |
| Dual-75 Duster | BELLY WEAPON: Dual-75 Duster | |
| L105 Zephyr | BELLY WEAPON: L105 Zephyr | |
| L105 Zephyr | BELLY WEAPON: L105 Zephyr | |
| CAS 14-E | CAS 14-E | |
| CAS 14-E | CAS 14-E | |
| Medical Applicator 1 | Combat Medic: Tool Slot | |
| Medical Applicator 1 | Combat Medic: Tool Slot | |
| Anti-Vehicle MANA Turret | Engineer: Ability: Anti-Vehicle MANA Turret | |
| Anti-Vehicle MANA Turret | Engineer: Ability: Anti-Vehicle MANA Turret | |
| MANA Anti-Vehicle Turret | Engineer: Ability: Anti-Vehicle MANA Turret | |
| Spitfire Auto-Turret | Engineer: Ability: Spitfire Auto-Turret | |
| Spitfire Auto-Turret | Engineer: Ability: Spitfire Auto-Turret | |
| Nano-Armor Kit 1 | Engineer: Tool Slot | |
| Nano-Armor Kit 1 | Engineer: Tool Slot | |
| G40-F Ranger | FRONT WEAPON: G40-F Ranger | |
| G40-F Ranger | FRONT WEAPON: G40-F Ranger | |
| M12 Kobalt | FRONT WEAPON: M12 Kobalt | |
| M12 Kobalt | FRONT WEAPON: M12 Kobalt | |
| M60-G Bulldog | FRONT WEAPON: M60-G Bulldog | |
| M60-G Bulldog | FRONT WEAPON: M60-G Bulldog | |
| Hellion G20 | Hellion G20 | |
| Hellion G20 | Hellion G20 | |
| Recon Detection Device 1 | Infiltrator: Tool Slot | |
| Recon Detection Device 1 | Infiltrator: Tool Slot | |
| CAS30 Tank Buster | NOSE WEAPON: CAS30 Tank Buster | |
| CAS30 Tank Buster | NOSE WEAPON: CAS30 Tank Buster | |
| L-24R Spur | NOSE WEAPON: L-24R Spur | |
| L-24R Spur | NOSE WEAPON: L-24R Spur | |
| M40 Fury-F | PRIMARY WEAPON: M40 Fury-F | |
| M40 Fury-F | PRIMARY WEAPON: M40 Fury-F | |
| L100 Python HESH | PRIMARY WEAPON: L100 Python HESH | |
| L100 Python HESH | PRIMARY WEAPON: L100 Python HESH | |
| G40-F Ranger | REAR WEAPON: G40-F Ranger | |
| G40-F Ranger | REAR WEAPON: G40-F Ranger | |
| M12 Kobalt | REAR WEAPON: M12 Kobalt | |
| M12 Kobalt | REAR WEAPON: M12 Kobalt | |
| M60-G Bulldog | REAR WEAPON: M60-G Bulldog | |
| M60-G Bulldog | REAR WEAPON: M60-G Bulldog | |
| A30 Walker | TAIL WEAPON: A30 Walker | |
| A30 Walker | TAIL WEAPON: A30 Walker | |
| Hyena Missile Launcher | TAIL WEAPON: Hyena Missile Launcher | |
| Hyena Missile Launcher | TAIL WEAPON: Hyena Missile Launcher | |
| M60-A Bulldog | TAIL WEAPON: M60-A Bulldog | |
| M60-A Bulldog | TAIL WEAPON: M60-A Bulldog | |
| E540 Halberd-H | TOP WEAPON: E540 Halberd-H | |
| E540 Halberd-H | TOP WEAPON: E540 Halberd-H | |
| G30 Walker | TOP WEAPON: G30 Walker | |
| G30 Walker | TOP WEAPON: G30 Walker | |
| G40-F Ranger | TOP WEAPON: G40-F Ranger | |
| G40-F Ranger | TOP WEAPON: G40-F Ranger | |
| M12 Kobalt | TOP WEAPON: M12 Kobalt | |
| M12 Kobalt | TOP WEAPON: M12 Kobalt | |
| M12 Kobalt-H | TOP WEAPON: M12 Kobalt-H | |
| M12 Kobalt-H | TOP WEAPON: M12 Kobalt-H | |
| M20 Basilisk | TOP WEAPON: M20 Basilisk | |
| M20 Basilisk | TOP WEAPON: M20 Basilisk | |
| M40 Fury-H | TOP WEAPON: M40 Fury-H | |
| M40 Fury-H | TOP WEAPON: M40 Fury-H | |
 | Hardlight Barrier | ||
 | Hardlight Barrier | ||
| Hoplon Anti-Aircraft Phalanx Tower | ||
| Hoplon Anti-Aircraft Phalanx Tower | ||
| Light Air Terminal | ||
| Light Air Terminal | ||
| Light Vehicle Terminal | ||
| Light Vehicle Terminal | ||
| Orbital Strike Uplink | ||
| Orbital Strike Uplink | ||
| Recon Array | ||
| Recon Array | ||
| Repair Module | ||
| Repair Module | ||
| Routing Spire | ||
| Routing Spire | ||
| Sentinel Relay | ||
| Sentinel Relay | ||
| Skywall Shield Emitter | ||
| Skywall Shield Emitter | ||
| Spear Anti-Vehicle Tower | ||
| Spear Anti-Vehicle Tower | ||
| Structure Shield Module | ||
| Structure Shield Module | ||
| The Flail | ||
| The Flail | ||
| Turret AI Module | ||
| Turret AI Module | ||
| Vehicle Ammo Dispenser | ||
| Vehicle Ammo Dispenser | ||
| Vehicle Gate | ||
| Vehicle Gate | ||
| Vehicle Ramp | ||
| Vehicle Ramp | ||
| Name | Class/Vehicle | Skillset |