Retaliate
Profile: 5428011263360186145Server: Emerald | [Control] | [Map] | [Real-time Map]
Faction: Vanu Sovereignty
Outfit: DasAnfall (a member since 2013-03-06 08:25:45.0)
Player Items
Attachment
Name | Class/Vehicle | Skillset | |
|---|---|---|---|
 | HPR Reflex (1x) | Primary: Assault Rifle: Corvus VA55 | |
| HPR Reflex (1x) | Primary: Assault Rifle: Equinox VE2 | |
 | HS/NV Scope (1x) | Primary: Assault Rifle: Equinox VE2 | |
 | Advanced Laser Sight | Primary: Assault Rifle: H-V45 | |
| HS/NV Scope (1x) | Primary: Assault Rifle: H-V45 | |
 | Unknown item (10178) | Primary: Assault Rifle: H-V45 | |
 | V3 Holo (3.4x) | Primary: Assault Rifle: H-V45 | |
 | LANS (3.4x) | Primary: Assault Rifle: NS-11A | |
 | Laser Sight | Primary: Assault Rifle: NS-11A | |
 | NiCO (1x) | Primary: Assault Rifle: NS-11A | |
 | NiCO XR (2x) | Primary: Assault Rifle: NS-11A | |
 | Soft Point Ammunition | Primary: Assault Rifle: NS-11A | |
| HS/NV Scope (1x) | Primary: Carbine: NS-11C | |
| Laser Sight | Primary: Carbine: NS-11C | |
| NiCO XR (2x) | Primary: Carbine: NS-11C | |
 | Compensator | Primary: Carbine: Pulsar C | |
 | Forward Grip | Primary: Carbine: Pulsar C | |
| HS/NV Scope (1x) | Primary: Carbine: Pulsar C | |
 | Unknown item (9502) | Primary: Carbine: Pulsar C | |
| V3 Holo (3.4x) | Primary: Carbine: Pulsar C | |
| HPR Reflex (1x) | Primary: Carbine: Serpent VE92 | |
| HS/NV Scope (1x) | Primary: Carbine: Serpent VE92 | |
| Laser Sight | Primary: Carbine: Serpent VE92 | |
| Unknown item (9582) | Primary: Carbine: Serpent VE92 | |
 | Grenade Launcher | Primary: Carbine: Solstice SF | |
| HS/NV Scope (1x) | Primary: Carbine: Solstice SF | |
| Laser Sight | Primary: Carbine: Solstice VE3 | |
 | VHO Reflex (2x) | Primary: Carbine: Solstice VE3 | |
| Laser Sight | Primary: Carbine: VX6-7 | |
| Unknown item (9482) | Primary: Carbine: VX6-7 | |
| V3 Holo (3.4x) | Primary: Carbine: VX6-7 | |
 | 1.25x Zoom Optics | PRIMARY WEAPON: M20 Basilisk-F | |
 | Ammo Capacity 1 | PRIMARY WEAPON: M20 Basilisk-F | |
| 1.25x Zoom Optics | PRIMARY WEAPON: M40 Fury-F | |
| Ammo Capacity 1 | PRIMARY WEAPON: M40 Fury-F | |
| 1.25x Zoom Optics | PRIMARY WEAPON: S12 Renegade | |
| Ammo Capacity 1 | PRIMARY WEAPON: S12 Renegade | |
| 1.25x Zoom Optics | LEFT WEAPON: M60-A Bulldog | |
| Ammo Capacity 1 | LEFT WEAPON: M60-A Bulldog | |
| 1.25x Zoom Optics | RIGHT WEAPON: M60-A Bulldog | |
| Ammo Capacity 1 | RIGHT WEAPON: M60-A Bulldog | |
| 1.25x Zoom Optics | TAIL WEAPON: A30 Walker | |
| Ammo Capacity 1 | TAIL WEAPON: A30 Walker | |
| 1.25x Zoom Optics | TOP WEAPON: A30 Walker | |
| Ammo Capacity 1 | TOP WEAPON: A30 Walker | |
| 1.25x Zoom Optics | TOP WEAPON: E540 Halberd-H | |
| Ammo Capacity 1 | TOP WEAPON: E540 Halberd-H | |
| Ammo Capacity 2 | TOP WEAPON: E540 Halberd-H | |
| Ammo Capacity 3 | TOP WEAPON: E540 Halberd-H | |
| Ammo Capacity 4 | TOP WEAPON: E540 Halberd-H | |
 | Night Vision Optics | TOP WEAPON: E540 Halberd-H | |
 | Threat Detection Optics | TOP WEAPON: E540 Halberd-H | |
| 1.25x Zoom Optics | TOP WEAPON: M40 Fury-H | |
| Ammo Capacity 1 | TOP WEAPON: M40 Fury-H | |
| Ammo Capacity 2 | TOP WEAPON: M40 Fury-H | |
| Ammo Capacity 3 | TOP WEAPON: M40 Fury-H | |
| Ammo Capacity 4 | TOP WEAPON: M40 Fury-H | |
| Ammo Capacity 5 | TOP WEAPON: M40 Fury-H | |
 | Magazine Size 1 | TOP WEAPON: M40 Fury-H | |
| Magazine Size 2 | TOP WEAPON: M40 Fury-H | |
| Magazine Size 3 | TOP WEAPON: M40 Fury-H | |
| Threat Detection Optics | TOP WEAPON: M40 Fury-H | |
| Ammo Capacity 1 | TOP WEAPON: Proton II PPA-H | |
| Ammo Capacity 2 | TOP WEAPON: Proton II PPA-H | |
| Ammo Capacity 3 | TOP WEAPON: Proton II PPA-H | |
| Night Vision Optics | TOP WEAPON: Proton II PPA-H | |
| 1.25x Zoom Optics | TOP WEAPON: Saron HRB-H | |
| Ammo Capacity 1 | TOP WEAPON: Saron HRB-H | |
| Ammo Capacity 2 | TOP WEAPON: Saron HRB-H | |
 | Extended Magazine | Primary: Heavy Weapon: Lasher X2 | |
| Forward Grip | Primary: Heavy Weapon: Lasher X2 | |
| Laser Sight | Primary: Heavy Weapon: Lasher X2 | |
| VHO Reflex (2x) | Primary: Heavy Weapon: Lasher X2 | |
| Compensator | Primary: LMG: Flare VE6 | |
 | Forward Grip | Primary: LMG: Flare VE6 | |
| HPR Reflex (1x) | Primary: LMG: Flare VE6 | |
| HS/NV Scope (1x) | Primary: LMG: Flare VE6 | |
| Laser Sight | Primary: LMG: Flare VE6 | |
| VHO Reflex (2x) | Primary: LMG: Flare VE6 | |
| HPR Reflex (1x) | Primary: LMG: Orion VS54 | |
| Laser Sight | Primary: LMG: Orion VS54 | |
| Laser Sight | Primary: LMG: Pulsar LSW | |
| VHO Reflex (2x) | Primary: LMG: Pulsar LSW | |
| Compensator | Primary: LMG: SVA-88 | |
| Forward Grip | Primary: LMG: SVA-88 | |
| High Velocity Ammunition | Primary: LMG: SVA-88 | |
| HS/NV Scope (1x) | Primary: LMG: SVA-88 | |
| Laser Sight | Primary: LMG: SVA-88 | |
| V3 Holo (3.4x) | Primary: LMG: SVA-88 | |
| VHO Reflex (2x) | Primary: LMG: SVA-88 | |
| Compensator | Primary: LMG: Ursa | |
| HS/NV Scope (1x) | Primary: LMG: Ursa | |
| Laser Sight | Primary: LMG: Ursa | |
| V3 Holo (3.4x) | Primary: LMG: Ursa | |
| HPR Reflex (1x) | Primary: LMG: VX29 Polaris | |
| Laser Sight | Primary: LMG: VX29 Polaris | |
| Unknown item (11399) | Primary: LMG: VX29 Polaris | |
| V3 Holo (3.4x) | Primary: LMG: VX29 Polaris | |
| VHO Reflex (2x) | Primary: LMG: VX29 Polaris | |
 | Compensator | Primary: LMG: NS-15M | |
 | Forward Grip | Primary: LMG: NS-15M | |
| HS/NV Scope (1x) | Primary: LMG: NS-15M | |
| LANS (3.4x) | Primary: LMG: NS-15M | |
| Laser Sight | Primary: LMG: NS-15M | |
| NiCO XR (2x) | Primary: LMG: NS-15M | |
| Extended Magazine | Primary: Shotgun: Deimos VA29 | |
| HS/NV Scope (1x) | Primary: Shotgun: Deimos VA29 | |
| Extended Magazine | Primary: Shotgun: Nova | |
| Extended Magazine | Primary: Shotgun: Phobos VX86 | |
| Extended Magazine | Primary: SMG: Eridani SX5 | |
| Laser Sight | Primary: SMG: Sirius SX12 | |
| Unknown item (11847) | Primary: SMG: Sirius SX12 | |
| VHO Reflex (2x) | Primary: SMG: Sirius SX12 | |
| Laser Sight | Secondary: Pistol: NS-44G Commissioner | |
 | Mach-10 (10x) | Primary: Sniper Rifle: Parallax VX3 | |
 | TriGon-8 (8x) | Primary: Sniper Rifle: V10 | |
| 1.5x Zoom Optics | BELLY WEAPON: AP30 Shredder | |
| Ammo Capacity 1 | BELLY WEAPON: AP30 Shredder | |
| Ammo Capacity 2 | BELLY WEAPON: AP30 Shredder | |
| Ammo Capacity 3 | BELLY WEAPON: AP30 Shredder | |
| Night Vision Optics | BELLY WEAPON: AP30 Shredder | |
| 1.5x Zoom Optics | BELLY WEAPON: C150 Dalton | |
| 2x Zoom Optics | BELLY WEAPON: C150 Dalton | |
| Ammo Capacity 1 | BELLY WEAPON: C150 Dalton | |
| Ammo Capacity 2 | BELLY WEAPON: C150 Dalton | |
| Ammo Capacity 3 | BELLY WEAPON: C150 Dalton | |
| Ammo Capacity 4 | BELLY WEAPON: C150 Dalton | |
| Ammo Capacity 5 | BELLY WEAPON: C150 Dalton | |
| Night Vision Optics | BELLY WEAPON: C150 Dalton | |
 | Reload Speed 1 | BELLY WEAPON: C150 Dalton | |
| Reload Speed 2 | BELLY WEAPON: C150 Dalton | |
| Reload Speed 3 | BELLY WEAPON: C150 Dalton | |
| Threat Detection Optics | BELLY WEAPON: C150 Dalton | |
| 1.5x Zoom Optics | BELLY WEAPON: L105 Zephyr | |
| Ammo Capacity 1 | BELLY WEAPON: L105 Zephyr | |
| Ammo Capacity 2 | BELLY WEAPON: L105 Zephyr | |
| Ammo Capacity 3 | BELLY WEAPON: L105 Zephyr | |
| Ammo Capacity 4 | BELLY WEAPON: L105 Zephyr | |
| Ammo Capacity 5 | BELLY WEAPON: L105 Zephyr | |
| Ammo Capacity 6 | BELLY WEAPON: L105 Zephyr | |
| Ammo Capacity 7 | BELLY WEAPON: L105 Zephyr | |
| Night Vision Optics | BELLY WEAPON: L105 Zephyr | |
| Reload Speed 1 | BELLY WEAPON: L105 Zephyr | |
| Reload Speed 2 | BELLY WEAPON: L105 Zephyr | |
| Reload Speed 3 | BELLY WEAPON: L105 Zephyr | |
| Reload Speed 4 | BELLY WEAPON: L105 Zephyr | |
| Reload Speed 5 | BELLY WEAPON: L105 Zephyr | |
| Threat Detection Optics | BELLY WEAPON: L105 Zephyr | |
| 1.25x Zoom Optics | NOSE WEAPON: CAS30 Tank Buster | |
| Ammo Capacity 1 | NOSE WEAPON: CAS30 Tank Buster | |
| Ammo Capacity 2 | NOSE WEAPON: CAS30 Tank Buster | |
| Ammo Capacity 3 | NOSE WEAPON: CAS30 Tank Buster | |
| Ammo Capacity 4 | NOSE WEAPON: CAS30 Tank Buster | |
| Ammo Capacity 5 | NOSE WEAPON: CAS30 Tank Buster | |
| Ammo Capacity 6 | NOSE WEAPON: CAS30 Tank Buster | |
| Ammo Capacity 7 | NOSE WEAPON: CAS30 Tank Buster | |
| Ammo Capacity 8 | NOSE WEAPON: CAS30 Tank Buster | |
| Ammo Capacity 9 | NOSE WEAPON: CAS30 Tank Buster | |
| Ammo Capacity 10 | NOSE WEAPON: CAS30 Tank Buster | |
| Magazine Size 1 | NOSE WEAPON: CAS30 Tank Buster | |
| Magazine Size 2 | NOSE WEAPON: CAS30 Tank Buster | |
| Magazine Size 3 | NOSE WEAPON: CAS30 Tank Buster | |
| Magazine Size 4 | NOSE WEAPON: CAS30 Tank Buster | |
| Night Vision Optics | NOSE WEAPON: CAS30 Tank Buster | |
| Threat Detection Optics | NOSE WEAPON: CAS30 Tank Buster | |
| 1.25x Zoom Optics | NOSE WEAPON: L-30R Vektor | |
| Ammo Capacity 1 | NOSE WEAPON: L-30R Vektor | |
| Ammo Capacity 2 | NOSE WEAPON: L-30R Vektor | |
| Ammo Capacity 3 | NOSE WEAPON: L-30R Vektor | |
| 1.5x Zoom Optics | TAIL WEAPON: A30 Walker | |
| 1.25x Zoom Optics | TAIL WEAPON: A30 Walker | |
| Ammo Capacity 1 | TAIL WEAPON: A30 Walker | |
| Ammo Capacity 2 | TAIL WEAPON: A30 Walker | |
| 1.25x Zoom Optics | TAIL WEAPON: M20 Drake | |
| Ammo Capacity 1 | TAIL WEAPON: M20 Drake | |
| 1.25x Zoom Optics | TAIL WEAPON: M60-A Bulldog | |
| Ammo Capacity 1 | TAIL WEAPON: M60-A Bulldog | |
| Ammo Capacity 2 | TAIL WEAPON: M60-A Bulldog | |
| Night Vision Optics | TAIL WEAPON: M60-A Bulldog | |
| 1.25x Zoom Optics | PRIMARY WEAPON: C75 Viper | |
| Ammo Capacity 1 | PRIMARY WEAPON: C75 Viper | |
| 1.25x Zoom Optics | PRIMARY WEAPON: L100 Python AP | |
| Ammo Capacity 1 | PRIMARY WEAPON: L100 Python AP | |
| Ammo Capacity 2 | PRIMARY WEAPON: L100 Python AP | |
| 1.5x Zoom Optics | PRIMARY WEAPON: Skyguard | |
| Ammo Capacity 1 | PRIMARY WEAPON: Skyguard | |
| Ammo Capacity 2 | PRIMARY WEAPON: Skyguard | |
| 1.25x Zoom Optics | PRIMARY WEAPON: L100 Python HEAT | |
| Ammo Capacity 1 | PRIMARY WEAPON: L100 Python HEAT | |
| Ammo Capacity 2 | PRIMARY WEAPON: L100 Python HEAT | |
| Ammo Capacity 3 | PRIMARY WEAPON: L100 Python HEAT | |
| Night Vision Optics | PRIMARY WEAPON: L100 Python HEAT | |
| 1.25x Zoom Optics | PRIMARY WEAPON: L100 Python HESH | |
| Ammo Capacity 1 | PRIMARY WEAPON: L100 Python HESH | |
| Ammo Capacity 2 | PRIMARY WEAPON: L100 Python HESH | |
| Ammo Capacity 3 | PRIMARY WEAPON: L100 Python HESH | |
| Ammo Capacity 4 | PRIMARY WEAPON: L100 Python HESH | |
| Night Vision Optics | PRIMARY WEAPON: L100 Python HESH | |
| Threat Detection Optics | PRIMARY WEAPON: L100 Python HESH | |
| 1.25x Zoom Optics | GUNNER WEAPON: E540 Halberd | |
| Ammo Capacity 1 | GUNNER WEAPON: E540 Halberd | |
| Ammo Capacity 2 | GUNNER WEAPON: E540 Halberd | |
| Ammo Capacity 3 | GUNNER WEAPON: E540 Halberd | |
| Night Vision Optics | GUNNER WEAPON: E540 Halberd | |
| 1.25x Zoom Optics | GUNNER WEAPON: G30 Walker | |
| Ammo Capacity 1 | GUNNER WEAPON: G30 Walker | |
| Ammo Capacity 1 | GUNNER WEAPON: Proton II PPA | |
| Ammo Capacity 2 | GUNNER WEAPON: Proton II PPA | |
| Night Vision Optics | GUNNER WEAPON: Proton II PPA | |
| 1.25x Zoom Optics | GUNNER WEAPON: Saron HRB | |
| Ammo Capacity 1 | GUNNER WEAPON: Saron HRB | |
| Ammo Capacity 2 | GUNNER WEAPON: Saron HRB | |
| Ammo Capacity 3 | GUNNER WEAPON: Saron HRB | |
| Ammo Capacity 4 | GUNNER WEAPON: Saron HRB | |
| Night Vision Optics | GUNNER WEAPON: Saron HRB | |
| 1.25x Zoom Optics | PRIMARY WEAPON: Supernova FPC | |
| Ammo Capacity 1 | PRIMARY WEAPON: Supernova FPC | |
| Ammo Capacity 2 | PRIMARY WEAPON: Supernova FPC | |
| 1.25x Zoom Optics | PRIMARY WEAPON: Supernova PC | |
| Ammo Capacity 1 | PRIMARY WEAPON: Supernova PC | |
| Ammo Capacity 2 | PRIMARY WEAPON: Supernova PC | |
| Ammo Capacity 3 | PRIMARY WEAPON: Supernova PC | |
| Ammo Capacity 4 | PRIMARY WEAPON: Supernova PC | |
| Night Vision Optics | PRIMARY WEAPON: Supernova PC | |
| Threat Detection Optics | PRIMARY WEAPON: Supernova PC | |
| 1.25x Zoom Optics | PRIMARY WEAPON: Supernova VPC | |
| Ammo Capacity 1 | PRIMARY WEAPON: Supernova VPC | |
| Ammo Capacity 2 | PRIMARY WEAPON: Supernova VPC | |
| Ammo Capacity 3 | PRIMARY WEAPON: Supernova VPC | |
| Night Vision Optics | PRIMARY WEAPON: Supernova VPC | |
| Ammo Capacity 1 | NOSE CANNON: Light PPA | |
| Ammo Capacity 2 | NOSE CANNON: Light PPA | |
| Night Vision Optics | NOSE CANNON: Light PPA | |
| 1.5x Zoom Optics | NOSE CANNON: Maelstrom Turbo Laser | |
| 1.25x Zoom Optics | NOSE CANNON: Maelstrom Turbo Laser | |
| 1.75x Zoom Optics | NOSE CANNON: Maelstrom Turbo Laser | |
| 2x Zoom Optics | NOSE CANNON: Maelstrom Turbo Laser | |
| Ammo Capacity 1 | NOSE CANNON: Maelstrom Turbo Laser | |
| Ammo Capacity 2 | NOSE CANNON: Maelstrom Turbo Laser | |
| Ammo Capacity 3 | NOSE CANNON: Maelstrom Turbo Laser | |
| Ammo Capacity 4 | NOSE CANNON: Maelstrom Turbo Laser | |
| Ammo Capacity 5 | NOSE CANNON: Maelstrom Turbo Laser | |
| Ammo Capacity 6 | NOSE CANNON: Maelstrom Turbo Laser | |
| Ammo Capacity 7 | NOSE CANNON: Maelstrom Turbo Laser | |
| Ammo Capacity 8 | NOSE CANNON: Maelstrom Turbo Laser | |
| Ammo Capacity 9 | NOSE CANNON: Maelstrom Turbo Laser | |
| Ammo Capacity 10 | NOSE CANNON: Maelstrom Turbo Laser | |
| Magazine Size 1 | NOSE CANNON: Maelstrom Turbo Laser | |
| Magazine Size 2 | NOSE CANNON: Maelstrom Turbo Laser | |
| Magazine Size 3 | NOSE CANNON: Maelstrom Turbo Laser | |
| Magazine Size 4 | NOSE CANNON: Maelstrom Turbo Laser | |
| Night Vision Optics | NOSE CANNON: Maelstrom Turbo Laser | |
| Reload Speed 1 | NOSE CANNON: Maelstrom Turbo Laser | |
| Reload Speed 2 | NOSE CANNON: Maelstrom Turbo Laser | |
| Reload Speed 3 | NOSE CANNON: Maelstrom Turbo Laser | |
| Reload Speed 4 | NOSE CANNON: Maelstrom Turbo Laser | |
| Reload Speed 5 | NOSE CANNON: Maelstrom Turbo Laser | |
| Threat Detection Optics | NOSE CANNON: Maelstrom Turbo Laser | |
| 1.5x Zoom Optics | NOSE CANNON: Saron Laser Cannon | |
| 1.25x Zoom Optics | NOSE CANNON: Saron Laser Cannon | |
| Ammo Capacity 1 | NOSE CANNON: Saron Laser Cannon | |
| Ammo Capacity 2 | NOSE CANNON: Saron Laser Cannon | |
| Ammo Capacity 3 | NOSE CANNON: Saron Laser Cannon | |
| Ammo Capacity 4 | NOSE CANNON: Saron Laser Cannon | |
| Magazine Size 1 | NOSE CANNON: Saron Laser Cannon | |
| Magazine Size 2 | NOSE CANNON: Saron Laser Cannon | |
| 1.5x Zoom Optics | WING MOUNT: Dual Photon Pods | |
| 1.25x Zoom Optics | WING MOUNT: Dual Photon Pods | |
| 1.75x Zoom Optics | WING MOUNT: Dual Photon Pods | |
| 2x Zoom Optics | WING MOUNT: Dual Photon Pods | |
| Ammo Capacity 1 | WING MOUNT: Dual Photon Pods | |
| Ammo Capacity 2 | WING MOUNT: Dual Photon Pods | |
| Ammo Capacity 3 | WING MOUNT: Dual Photon Pods | |
| Ammo Capacity 4 | WING MOUNT: Dual Photon Pods | |
| Ammo Capacity 5 | WING MOUNT: Dual Photon Pods | |
| Ammo Capacity 6 | WING MOUNT: Dual Photon Pods | |
| Night Vision Optics | WING MOUNT: Dual Photon Pods | |
| Reload Speed 1 | WING MOUNT: Dual Photon Pods | |
| Reload Speed 2 | WING MOUNT: Dual Photon Pods | |
| Reload Speed 3 | WING MOUNT: Dual Photon Pods | |
| Reload Speed 4 | WING MOUNT: Dual Photon Pods | |
| Reload Speed 5 | WING MOUNT: Dual Photon Pods | |
| Threat Detection Optics | WING MOUNT: Dual Photon Pods | |
| 1.25x Zoom Optics | WING MOUNT: Photon A2A Missile Pods | |
| Ammo Capacity 1 | WING MOUNT: Photon A2A Missile Pods | |
| Ammo Capacity 2 | WING MOUNT: Photon A2A Missile Pods | |
| Ammo Capacity 3 | WING MOUNT: Photon A2A Missile Pods | |
| Ammo Capacity 4 | WING MOUNT: Photon A2A Missile Pods | |
| Reload Speed 1 | WING MOUNT: Photon A2A Missile Pods | |
| 1.25x Zoom Optics | FRONT WEAPON: M20 Basilisk | |
| Ammo Capacity 1 | FRONT WEAPON: M20 Basilisk | |
| 1.25x Zoom Optics | FRONT WEAPON: M40 Fury | |
| Ammo Capacity 1 | FRONT WEAPON: M40 Fury | |
| Ammo Capacity 2 | FRONT WEAPON: M40 Fury | |
| Ammo Capacity 3 | FRONT WEAPON: M40 Fury | |
| Night Vision Optics | FRONT WEAPON: M40 Fury | |
| 1.25x Zoom Optics | FRONT WEAPON: M60-G Bulldog | |
| Ammo Capacity 1 | FRONT WEAPON: M60-G Bulldog | |
| 1.5x Zoom Optics | REAR WEAPON: G30 Walker | |
| 1.25x Zoom Optics | REAR WEAPON: G30 Walker | |
| Ammo Capacity 1 | REAR WEAPON: G30 Walker | |
| Ammo Capacity 2 | REAR WEAPON: G30 Walker | |
| Ammo Capacity 3 | REAR WEAPON: G30 Walker | |
| 1.25x Zoom Optics | REAR WEAPON: M20 Basilisk | |
| Ammo Capacity 1 | REAR WEAPON: M20 Basilisk | |
| 1.25x Zoom Optics | REAR WEAPON: M40 Fury | |
| Ammo Capacity 1 | REAR WEAPON: M40 Fury | |
| Ammo Capacity 2 | REAR WEAPON: M40 Fury | |
| Ammo Capacity 3 | REAR WEAPON: M40 Fury | |
 | Compensator | ||
| Compensator | ||
 | Default Front Sight | ||
| Default Rear Sight | ||
| Name | Class/Vehicle | Skillset |
Boost
Name | Class/Vehicle | Skillset | |
|---|---|---|---|
 | Alpha Squad Boost | ||
 | Experience Boost - 7 Day | ||
 | Heroic Boost - 6 Month | ||
 | Hyper Boost - 3 day | ||
 | Nanite Boost - 1 Day | ||
 | Nanite Boost - 7 Day | ||
 | Squad Experience Boost - 7 Day | ||
 | Squad Resource Boost - 1 Day | ||
 | Squad Resource Boost - 7 Day | ||
| Name | Class/Vehicle | Skillset |
CertPoint
Name | Class/Vehicle | Skillset | |
|---|---|---|---|
| 2 Cert Points | |||
| 10 Cert Points | |||
| 20 Cert Points | |||
| Name | Class/Vehicle | Skillset |
Customization
Name | Class/Vehicle | Skillset | |
|---|---|---|---|
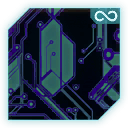 | Circuit Board Camo | ||
 | Giraffe - Single Use | ||
 | Unknown item (20472) | ||
 | Unknown item (62038) | ||
 | Alpha Squad Decal | ||
 | Beta | ||
 | One-Year Anniversary Beta | ||
 | PlanetSide Veteran Decal | ||
 | World Domination Series 2013 | ||
 | Adept 1 Decal | ||
 | Adept 2 Decal | ||
 | Adept 3 Decal | ||
 | Adherent 1 Decal | ||
 | Adherent 2 Decal | ||
 | Adherent 3 Decal | ||
| Alpha Squad Decal | ||
 | Arcanus 1 Decal | ||
 | Arcanus 2 Decal | ||
 | Arcanus 3 Decal | ||
 | Archon 1 Decal | ||
 | Arid Forest - Single Use | ||
 | Ascendant 1 Decal | ||
 | Ascendant 2 Decal | ||
 | Ascendant 3 Decal | ||
 | Ascendant 4 Decal | ||
 | Aspirant 1 Decal | ||
 | Aspirant 2 Decal | ||
| Beta | ||
 | Castellan 1 Decal | ||
 | Castellan 2 Decal | ||
 | Castellan 3 Decal | ||
 | Castellan 4 Decal | ||
 | Castellan 5 Decal | ||
 | Centurion 1 Decal | ||
 | Centurion 2 Decal | ||
 | Centurion 3 Decal | ||
 | Centurion 4 Decal | ||
 | Centurion 5 Decal | ||
| Circuit Board Camo | ||
| Circuit Board Camo | ||
 | Decanus 1 Decal | ||
 | Decanus 2 Decal | ||
 | Decanus 3 Decal | ||
 | Disciple 1 Decal | ||
 | Disciple 2 Decal | ||
 | Immortal 1 Decal | ||
 | Immortal 2 Decal | ||
 | Immortal 3 Decal | ||
 | Immortal 4 Decal | ||
 | Immortal 5 Decal | ||
 | Indar Canyons v2 - Single Use | ||
 | Indar Dry Brush - Single Use | ||
 | Indar Dunes - Single Use | ||
 | Indar Savanna - Single Use | ||
 | India Scrub - Single Use | ||
 | Initiate Decal | ||
 | Justicar 1 Decal | ||
 | Justicar 2 Decal | ||
 | Justicar 3 Decal | ||
 | Justicar 4 Decal | ||
 | Legate 1 Decal | ||
 | Legate 2 Decal | ||
 | Legate 3 Decal | ||
 | Legate 4 Decal | ||
 | Legate 5 Decal | ||
 | Legionary 1 Decal | ||
 | Legionary 2 Decal | ||
 | Legionary 3 Decal | ||
 | Lictor 1 Decal | ||
 | Lictor 2 Decal | ||
 | Lictor 3 Decal | ||
 | Novus 1 Decal | ||
 | Novus 2 Decal | ||
 | Operant 1 Decal | ||
 | Operant 2 Decal | ||
 | Operant 3 Decal | ||
 | Pine Forest - Single Use | ||
| PlanetSide Veteran Decal | ||
 | Preceptor 1 Decal | ||
 | Preceptor 2 Decal | ||
 | Preceptor 3 Decal | ||
 | Prefect 1 Decal | ||
 | Prefect 2 Decal | ||
 | Prefect 3 Decal | ||
 | Primus 1 Decal | ||
 | Primus 2 Decal | ||
 | Primus 3 Decal | ||
 | Primus 4 Decal | ||
 | Primus 5 Decal | ||
 | Signifer 1 Decal | ||
 | Signifer 2 Decal | ||
 | Signifer 3 Decal | ||
 | Signifer 4 Decal | ||
 | Signifer 5 Decal | ||
 | Snow Aspen Forest - Single Use | ||
| Unknown item (20466) | ||
| Unknown item (20469) | ||
| Unknown item (62034) | ||
| Unknown item (62035) | ||
 | Venator 1 Decal | ||
 | Venator 2 Decal | ||
 | Venator 3 Decal | ||
 | Woodland - Single Use | ||
 | Alpha Squad Camo | ||
 | Loyal Soldier Camo | ||
| Name | Class/Vehicle | Skillset |
ExecuteScript
Name | Class/Vehicle | Skillset | |
|---|---|---|---|
 | Command Comm Channel Certification | Universal: Squad Leader | |
| Name | Class/Vehicle | Skillset |
Generic
Name | Class/Vehicle | Skillset | |
|---|---|---|---|
 | VS DSV-250 Afterburner | ||
| Unknown item (280) | |||
| Name | Class/Vehicle | Skillset |
GiveCurrency
Name | Class/Vehicle | Skillset | |
|---|---|---|---|
| Aerospace Resources | |||
| Auraxium | |||
| Infantry Resources | |||
| Mechanized Resources | |||
| Name | Class/Vehicle | Skillset |
GiveRewardSet
Name | Class/Vehicle | Skillset | |
|---|---|---|---|
 | Alpha Squad Items | ||
 | Loyal Soldier | ||
| nVidia Bundle | ||
| WDS Reward Bundle | ||
| Name | Class/Vehicle | Skillset |
InfantryCosmetic
Name | Class/Vehicle | Skillset | |
|---|---|---|---|
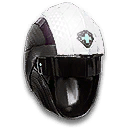 | VS-M001 Standard Helmet | ||
 | VS-E001 Standard Helmet | ||
 | VS-HA001 Standard Helmet | ||
 | VS-I001 Standard Helmet | ||
 | VS-LA001 Standard Helmet | ||
 | VS-MAX001 Standard Helmet | ||
| Name | Class/Vehicle | Skillset |
InfantryEquipment
Name | Class/Vehicle | Skillset | |
|---|---|---|---|
 | Nano-Regen Device 1 | Combat Medic: Ability Slot | |
| Nano-Regen Device 2 | Combat Medic: Ability Slot | |
| Nano-Regen Device 3 | Combat Medic: Ability Slot | |
| Nano-Regen Device 4 | Combat Medic: Ability Slot | |
| Nano-Regen Device 5 | Combat Medic: Ability Slot | |
| Nano-Regen Device 6 | Combat Medic: Ability Slot | |
 | Advanced Shield Capacitor 1 | Combat Medic: Suit Slot | |
| Advanced Shield Capacitor 2 | Combat Medic: Suit Slot | |
| Advanced Shield Capacitor 3 | Combat Medic: Suit Slot | |
 | Flak Armor 1 | Combat Medic: Suit Slot | |
| Flak Armor 2 | Combat Medic: Suit Slot | |
| Flak Armor 3 | Combat Medic: Suit Slot | |
| Flak Armor 4 | Combat Medic: Suit Slot | |
| Flak Armor 5 | Combat Medic: Suit Slot | |
 | Grenade Bandolier 1 | Combat Medic: Suit Slot | |
| Grenade Bandolier 2 | Combat Medic: Suit Slot | |
| Grenade Bandolier 3 | Combat Medic: Suit Slot | |
| Flak Armor 1 | Engineer: Suit Slot | |
| Flak Armor 2 | Engineer: Suit Slot | |
| Flak Armor 3 | Engineer: Suit Slot | |
| Flak Armor 4 | Engineer: Suit Slot | |
 | Utility Pouch 1 | Engineer: Suit Slot | |
| Utility Pouch 2 | Engineer: Suit Slot | |
| Utility Pouch 3 | Engineer: Suit Slot | |
| Utility Pouch 4 | Engineer: Suit Slot | |
| Utility Pouch 5 | Engineer: Suit Slot | |
 | Adrenaline Shield 1 | Heavy Assault: Ability Slot | |
| Adrenaline Shield 2 | Heavy Assault: Ability Slot | |
| Adrenaline Shield 3 | Heavy Assault: Ability Slot | |
| Adrenaline Shield 4 | Heavy Assault: Ability Slot | |
| Adrenaline Shield 5 | Heavy Assault: Ability Slot | |
 | Nanite Mesh Generator 1 | Heavy Assault: Ability Slot | |
| Nanite Mesh Generator 2 | Heavy Assault: Ability Slot | |
 | Resist Shield 1 | Heavy Assault: Ability Slot | |
| Resist Shield 2 | Heavy Assault: Ability Slot | |
| Resist Shield 3 | Heavy Assault: Ability Slot | |
| Resist Shield 4 | Heavy Assault: Ability Slot | |
| Resist Shield 5 | Heavy Assault: Ability Slot | |
| Advanced Shield Capacitor 1 | Heavy Assault: Suit Slot | |
| Advanced Shield Capacitor 2 | Heavy Assault: Suit Slot | |
| Flak Armor 1 | Heavy Assault: Suit Slot | |
| Flak Armor 2 | Heavy Assault: Suit Slot | |
| Flak Armor 3 | Heavy Assault: Suit Slot | |
| Flak Armor 4 | Heavy Assault: Suit Slot | |
| Flak Armor 5 | Heavy Assault: Suit Slot | |
| Grenade Bandolier 1 | Heavy Assault: Suit Slot | |
| Grenade Bandolier 2 | Heavy Assault: Suit Slot | |
| Grenade Bandolier 3 | Heavy Assault: Suit Slot | |
 | Hunter Cloaking 1 | Infiltrator: Ability Slot | |
| Hunter Cloaking 2 | Infiltrator: Ability Slot | |
| Hunter Cloaking 3 | Infiltrator: Ability Slot | |
| Hunter Cloaking 4 | Infiltrator: Ability Slot | |
| Hunter Cloaking 5 | Infiltrator: Ability Slot | |
| Hunter Cloaking 6 | Infiltrator: Ability Slot | |
| Flak Armor 1 | Infiltrator: Suit Slot | |
 | Drifter Jump Jets 1 | Light Assault: Ability Slot | |
| Drifter Jump Jets 2 | Light Assault: Ability Slot | |
| Drifter Jump Jets 3 | Light Assault: Ability Slot | |
| Drifter Jump Jets 4 | Light Assault: Ability Slot | |
| Drifter Jump Jets 5 | Light Assault: Ability Slot | |
 | Skirmisher Jump Jets 1 | Light Assault: Ability Slot | |
| Skirmisher Jump Jets 2 | Light Assault: Ability Slot | |
| Skirmisher Jump Jets 3 | Light Assault: Ability Slot | |
| Skirmisher Jump Jets 4 | Light Assault: Ability Slot | |
| Skirmisher Jump Jets 5 | Light Assault: Ability Slot | |
| Skirmisher Jump Jets 6 | Light Assault: Ability Slot | |
 | Adrenaline Pump | Light Assault: Suit Slot | |
| Advanced Shield Capacitor 1 | Light Assault: Suit Slot | |
| Flak Armor 1 | Light Assault: Suit Slot | |
| Flak Armor 2 | Light Assault: Suit Slot | |
| VS Turret Shield | ||
 | Charge 1 | MAX: Ability Slot | |
 | Nanite Auto Repair System 1 | MAX: Suit Slot | |
| Nanite Auto Repair System 2 | MAX: Suit Slot | |
| Nanite Auto Repair System 3 | MAX: Suit Slot | |
| Nanite Auto Repair System 4 | MAX: Suit Slot | |
| Nano-Regen Device 1 | Combat Medic: Ability Slot | |
| Nano-Regen Device 1 | Combat Medic: Ability Slot | |
| Nanite Mesh Generator 1 | Heavy Assault: Ability Slot | |
| Nanite Mesh Generator 1 | Heavy Assault: Ability Slot | |
| Hunter Cloaking 1 | Infiltrator: Ability Slot | |
| Hunter Cloaking 1 | Infiltrator: Ability Slot | |
| Skirmisher Jump Jets 1 | Light Assault: Ability Slot | |
| Skirmisher Jump Jets 1 | Light Assault: Ability Slot | |
| Charge 1 | MAX: Ability Slot | |
| Charge 1 | MAX: Ability Slot | |
| Name | Class/Vehicle | Skillset |
LoadoutTab
Name | Class/Vehicle | Skillset | |
|---|---|---|---|
 | Custom Infantry Loadout | ||
| Custom Vehicle Loadout | ||
| Name | Class/Vehicle | Skillset |
UnlockPlayerTitle
Name | Class/Vehicle | Skillset | |
|---|---|---|---|
 | Adept | ||
| Adherent | ||
| Alpha Squad Title - Founder | ||
| Arcanus | ||
| Archon | ||
| Ascendant | ||
| Aspirant | ||
| Castellan | ||
| Centurion | ||
| Decanus | ||
| Disciple | ||
| Exterminator | ||
| Immortal | ||
| Justicar | ||
| Legate | ||
| Legionary | ||
| Lictor | ||
| Loyal Soldier | ||
| Novus | ||
| Operant | ||
| Preceptor | ||
| Prefect | ||
| Primus | ||
| Signifer | ||
| Skirmisher | ||
| Venator | ||
| Veteran | ||
| Name | Class/Vehicle | Skillset |
VehicleCosmetic
Name | Class/Vehicle | Skillset | |
|---|---|---|---|
 | Headlights | ||
 | Cockpit: Standard Glass | ||
| Headlights | ||
| Cockpit: Standard Glass | ||
| Headlights | ||
 | Headlights | ||
| Cockpit: Standard Glass | ||
 | Headlights | ||
| Name | Class/Vehicle | Skillset |
VehicleEquipment
Name | Class/Vehicle | Skillset | |
|---|---|---|---|
 | Vehicle Stealth 1 | Flash: Defense Slot | |
 | Scout Radar 1 | Flash: Utility Slot | |
| Scout Radar 2 | Flash: Utility Slot | |
| Scout Radar 3 | Flash: Utility Slot | |
 | Composite Armor 1 | Harasser: Defense Slot | |
| Composite Armor 2 | Harasser: Defense Slot | |
| Composite Armor 3 | Harasser: Defense Slot | |
| Composite Armor 4 | Harasser: Defense Slot | |
 | Nanite Auto Repair System 1 | Harasser: Defense Slot | |
| Nanite Auto Repair System 2 | Harasser: Defense Slot | |
| Nanite Auto Repair System 3 | Harasser: Defense Slot | |
| Nanite Auto Repair System 4 | Harasser: Defense Slot | |
| Nanite Auto Repair System 5 | Harasser: Defense Slot | |
 | Racer High Speed Chassis 1 | Harasser: Performance Slot | |
| Racer High Speed Chassis 2 | Harasser: Performance Slot | |
| Racer High Speed Chassis 3 | Harasser: Performance Slot | |
 | Surger Power Chassis 1 | Harasser: Performance Slot | |
| Surger Power Chassis 2 | Harasser: Performance Slot | |
| Surger Power Chassis 3 | Harasser: Performance Slot | |
| Nanite Auto Repair System 1 | Liberator: Defense Slot | |
| Nanite Auto Repair System 2 | Liberator: Defense Slot | |
| Nanite Auto Repair System 3 | Liberator: Defense Slot | |
| Nanite Auto Repair System 4 | Liberator: Defense Slot | |
| Nanite Auto Repair System 5 | Liberator: Defense Slot | |
| Vehicle Stealth 1 | Liberator: Defense Slot | |
| Vehicle Stealth 2 | Liberator: Defense Slot | |
| Vehicle Stealth 3 | Liberator: Defense Slot | |
| Vehicle Stealth 4 | Liberator: Defense Slot | |
 | LF-100 Afterburner 2 | Liberator: Passive Systems | |
| LF-100 Afterburner 3 | Liberator: Passive Systems | |
| LF-100 Afterburner 4 | Liberator: Passive Systems | |
| LF-100 Afterburner 5 | Liberator: Passive Systems | |
 | High-G Airframe 1 | Liberator: Performance Slot | |
| High-G Airframe 2 | Liberator: Performance Slot | |
| High-G Airframe 3 | Liberator: Performance Slot | |
 | Precision Bomber Airframe 1 | Liberator: Performance Slot | |
| Precision Bomber Airframe 2 | Liberator: Performance Slot | |
| Precision Bomber Airframe 3 | Liberator: Performance Slot | |
 | Racer High Speed Airframe 1 | Liberator: Performance Slot | |
| Racer High Speed Airframe 2 | Liberator: Performance Slot | |
| Racer High Speed Airframe 3 | Liberator: Performance Slot | |
 | Decoy Flares 1 | Liberator: Utility Slot | |
| Decoy Flares 2 | Liberator: Utility Slot | |
| Decoy Flares 3 | Liberator: Utility Slot | |
| Decoy Flares 4 | Liberator: Utility Slot | |
| LF-100 Afterburner 1 | ||
| Nanite Auto Repair System 1 | Lightning: Defense Slot | |
| Nanite Auto Repair System 2 | Lightning: Defense Slot | |
| Nanite Auto Repair System 3 | Lightning: Defense Slot | |
| Nanite Auto Repair System 4 | Lightning: Defense Slot | |
| Vehicle Stealth 1 | Lightning: Defense Slot | |
 | Rival Combat Chassis 1 | Lightning: Performance Slot | |
| Rival Combat Chassis 2 | Lightning: Performance Slot | |
| Rival Combat Chassis 3 | Lightning: Performance Slot | |
 | Smoke Screen 1 | Lightning: Utility Slot | |
| Smoke Screen 2 | Lightning: Utility Slot | |
| Smoke Screen 3 | Lightning: Utility Slot | |
| Nanite Auto Repair System 1 | Magrider: Defense Slot | |
| Nanite Auto Repair System 2 | Magrider: Defense Slot | |
| Nanite Auto Repair System 3 | Magrider: Defense Slot | |
| Nanite Auto Repair System 4 | Magrider: Defense Slot | |
| Nanite Auto Repair System 5 | Magrider: Defense Slot | |
| Vehicle Stealth 1 | Magrider: Defense Slot | |
| Rival Combat Chassis 1 | Magrider: Performance Slot | |
| Rival Combat Chassis 2 | Magrider: Performance Slot | |
| Rival Combat Chassis 3 | Magrider: Performance Slot | |
 | Magburner 1 | Magrider: Utility Slot | |
| Magburner 2 | Magrider: Utility Slot | |
| Magburner 3 | Magrider: Utility Slot | |
| Magburner 4 | Magrider: Utility Slot | |
 | Composite Armor 1 | Scythe: Defense Slot | |
| Composite Armor 2 | Scythe: Defense Slot | |
| Composite Armor 3 | Scythe: Defense Slot | |
| Composite Armor 4 | Scythe: Defense Slot | |
| Nanite Auto Repair System 1 | Scythe: Defense Slot | |
| Nanite Auto Repair System 2 | Scythe: Defense Slot | |
| Nanite Auto Repair System 3 | Scythe: Defense Slot | |
| Nanite Auto Repair System 4 | Scythe: Defense Slot | |
| Nanite Auto Repair System 5 | Scythe: Defense Slot | |
| Vehicle Stealth 1 | Scythe: Defense Slot | |
| Vehicle Stealth 2 | Scythe: Defense Slot | |
| Vehicle Stealth 3 | Scythe: Defense Slot | |
| Vehicle Stealth 4 | Scythe: Defense Slot | |
 | Dogfighting Airframe 1 | Scythe: Performance Slot | |
| Dogfighting Airframe 2 | Scythe: Performance Slot | |
| Dogfighting Airframe 3 | Scythe: Performance Slot | |
 | Hover Stability Airframe 1 | Scythe: Performance Slot | |
| Hover Stability Airframe 2 | Scythe: Performance Slot | |
| Hover Stability Airframe 3 | Scythe: Performance Slot | |
| Racer High Speed Airframe 1 | Scythe: Performance Slot | |
| Racer High Speed Airframe 2 | Scythe: Performance Slot | |
| Racer High Speed Airframe 3 | Scythe: Performance Slot | |
| Decoy Flares 1 | Scythe: Utility Slot | |
| Decoy Flares 2 | Scythe: Utility Slot | |
| Decoy Flares 3 | Scythe: Utility Slot | |
| Decoy Flares 4 | Scythe: Utility Slot | |
 | Ejection System | Scythe: Utility Slot | |
 | Fire Suppression 1 | Scythe: Utility Slot | |
| Fire Suppression 2 | Scythe: Utility Slot | |
| Fire Suppression 3 | Scythe: Utility Slot | |
| Fire Suppression 4 | Scythe: Utility Slot | |
| Scout Radar 1 | Scythe: Utility Slot | |
| Scout Radar 2 | Scythe: Utility Slot | |
| Scout Radar 3 | Scythe: Utility Slot | |
| Scout Radar 4 | Scythe: Utility Slot | |
 | External Afterburner Fuel Tanks | WING MOUNT: External Fuel Tanks | |
 | Blockade Armor 1 | Sunderer: Defense Slot | |
| Blockade Armor 2 | Sunderer: Defense Slot | |
| Blockade Armor 3 | Sunderer: Defense Slot | |
 | Mine Guard 1 | Sunderer: Defense Slot | |
| Mine Guard 2 | Sunderer: Defense Slot | |
| Mine Guard 3 | Sunderer: Defense Slot | |
| Mine Guard 4 | Sunderer: Defense Slot | |
 | Vehicle Ammo Dispenser 1 | Sunderer: Defense Slot | |
| Vehicle Ammo Dispenser 2 | Sunderer: Defense Slot | |
| Vehicle Stealth 1 | Sunderer: Defense Slot | |
| Racer High Speed Chassis 1 | Sunderer: Performance Slot | |
| Racer High Speed Chassis 2 | Sunderer: Performance Slot | |
 | Unknown item (2990) | ||
 | External Afterburner Fuel Tanks | WING MOUNT: External Fuel Tanks | |
 | External Afterburner Fuel Tanks | WING MOUNT: External Fuel Tanks | |
 | NFI-2000 Turbo 1 | ||
| NFI-2000 Turbo 2 | ||
| NFI-2000 Turbo 3 | ||
| NFI-2000 Turbo 4 | ||
| NFI-2000 Turbo 5 | ||
| Name | Class/Vehicle | Skillset |
Weapon
Name | Class/Vehicle | Skillset | |
|---|---|---|---|
 | Nanite Revive Grenade | Combat Medic: Grenade Slot | |
 | Medical Applicator 1 | Combat Medic: Tool Slot | |
| Medical Applicator 2 | Combat Medic: Tool Slot | |
| Medical Applicator 3 | Combat Medic: Tool Slot | |
| Medical Applicator 4 | Combat Medic: Tool Slot | |
| Medical Applicator 5 | Combat Medic: Tool Slot | |
| Medical Applicator 6 | Combat Medic: Tool Slot | |
 | Ammunition Package 1 | Engineer: Ability Slot | |
| Ammunition Package 1 | Engineer: Ability Slot | |
| Ammunition Package 2 | Engineer: Ability Slot | |
| Ammunition Package 3 | Engineer: Ability Slot | |
| Ammunition Package 4 | Engineer: Ability Slot | |
| Ammunition Package 5 | Engineer: Ability Slot | |
| Ammunition Package 6 | Engineer: Ability Slot | |
 | Anti-Infantry MANA Turret | Engineer: Ability Slot | |
 | Nano-Armor Kit 1 | Engineer: Tool Slot | |
| Nano-Armor Kit 2 | Engineer: Tool Slot | |
| Nano-Armor Kit 3 | Engineer: Tool Slot | |
| Nano-Armor Kit 4 | Engineer: Tool Slot | |
| Nano-Armor Kit 5 | Engineer: Tool Slot | |
| Nano-Armor Kit 6 | Engineer: Tool Slot | |
 | Tank Mine | Engineer: Utility Slot | |
 | Anti-Vehicle Grenade | Heavy Assault: Grenade Slot | |
 | M20 Basilisk-H | TOP WEAPON: M20 Basilisk-H | |
 | Recon Detection Device 1 | Infiltrator: Tool Slot | |
| Recon Detection Device 2 | Infiltrator: Tool Slot | |
| Recon Detection Device 3 | Infiltrator: Tool Slot | |
| Recon Detection Device 4 | Infiltrator: Tool Slot | |
 | Sticky Grenade | Infiltrator: Grenade Slot | |
 | Proximity Mine | Infiltrator: Utility Slot | |
 | Smoke Grenade | Heavy Assault: Grenade Slot | |
 | Spawn Beacon | Universal: Squad Leader | |
 | Medical Kit | Universal: Utility Slot | |
| Restoration Kit | Universal: Utility Slot | |
 | Force-Blade | ||
 | Plasma Grenade | ||
 | Flash Grenade | Heavy Assault: Grenade Slot | |
 | L105 Zephyr PX | BELLY WEAPON: L105 Zephyr PX | |
 | C-4 | Heavy Assault: Utility Slot | |
 | Concussion Grenade | Heavy Assault: Grenade Slot | |
 | MANA Anti-Infantry Turret | ||
 | MAX Punch | ||
 | Xiphos Anti-Infantry Phalanx Turret | ||
| Medical Applicator 1 | Combat Medic: Tool Slot | |
| Medical Applicator 1 | Combat Medic: Tool Slot | |
 | MANA Anti-Vehicle Turret | Engineer: Ability: Anti-Vehicle MANA Turret | |
| Nano-Armor Kit 1 | Engineer: Tool Slot | |
| Nano-Armor Kit 1 | Engineer: Tool Slot | |
| Recon Detection Device 1 | Infiltrator: Tool Slot | |
| Recon Detection Device 1 | Infiltrator: Tool Slot | |
| Name | Class/Vehicle | Skillset |